Pepper jelly is a sweet and spicy delight that brings a burst of flavor to any meal. This versatile condiment can elevate your cheeseboard, pair beautifully with meats, or even serve as a unique dip for snacks. If you’re looking for a way to capture the essence of summer’s bountiful chili peppers, this recipe is your guiding light. With its vibrant color and distinctive taste, homemade pepper jelly offers a fresh alternative to store-bought varieties, allowing you to control the heat level and sweetness exactly to your liking.
In addition to its delightful taste, making pepper jelly is incredibly rewarding. The combination of fresh, finely chopped peppers, apple cider vinegar, lime juice, and sugar creates a perfect balance of sweet and tangy. It also makes for a fantastic gift or culinary project to enjoy with family and friends. Dive into this recipe and discover how easy it can be to make your own pepper jelly at home!
Quick Answer
To make pepper jelly, you’ll need finely chopped chili peppers, apple cider vinegar, lime juice, salt, pectin, and sugar. Combine the ingredients, boil, and then jar your delicious jelly for a delightful treat!
Why You’ll Love This Recipe
This pepper jelly recipe stands out for its simplicity and freshness. It’s quick to prepare, making it perfect for both seasoned canners and beginners alike. The tantalizing heat from the chili peppers is beautifully balanced with the sweetness of the sugar and the acidity of the vinegar and lime juice. Imagine slathering this spicy-sweet concoction over cream cheese on a cracker—it’s a hit at gatherings!
Not only does it taste great, but pepper jelly is also versatile. Pour it over grilled chicken or mix it into barbecue sauce for an enticing glaze. It can transform a mundane meal into something extraordinary and add an exciting twist to typical recipes. Plus, the satisfaction of preserving your own food is hard to beat; homemade foods often carry with them the love and effort put into them.
What Makes This Recipe Special
What makes this pepper jelly truly special is its customizable nature. You can choose a variety of chili peppers, from mild to hot, depending on your personal preference. This allows you to create a jelly that suits your taste buds perfectly. Additionally, the use of both apple cider vinegar and lime juice provides a depth of flavor that elevates the jam beyond the ordinary.
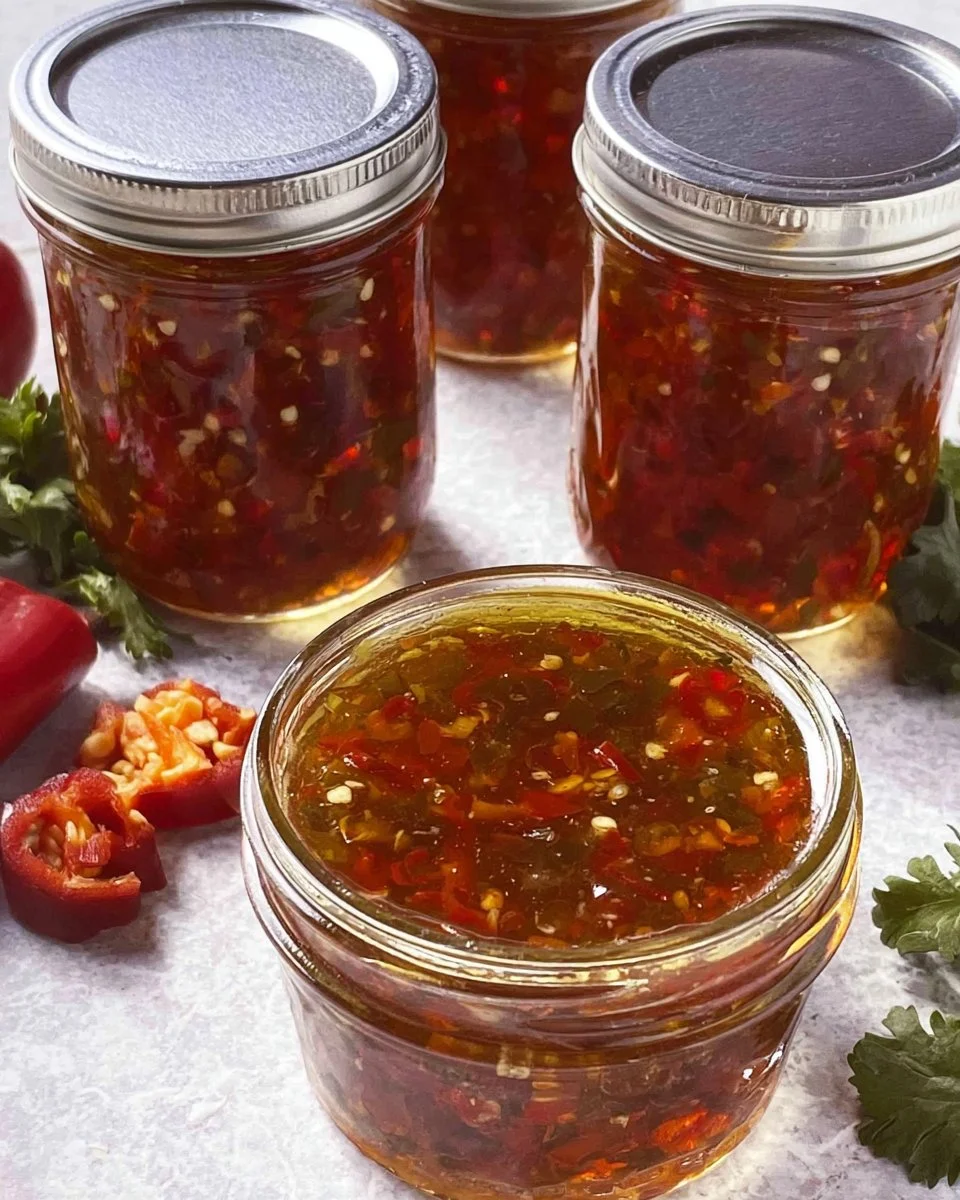
The vibrant color of the jelly, enhanced by the fresh peppers, makes it visually appealing. This can easily be a centerpiece at your next party or get-together. Each jar of homemade pepper jelly is not just a delicious condiment but also a testament to your cooking skills. The unique blend of flavors ensures that it pairs well with a variety of dishes, which is an essential quality for any preserve.
Kitchen Tools You’ll Need
- Large pan: For cooking your pepper jelly mix.
- Jars: Clean jars for storing the finished jelly.
- Lids: Secure lids to keep the jam fresh.
- Steamer rack: To process jars safely in boiling water.
- Water bath pot: Essential for boiling and preserving the jars.
Ingredients
- Chili peppers: Freshly chopped for the spicy base.
- Apple cider vinegar: Adds tanginess and helps preserve.
- Lime juice: Offers a bright, citrusy flavor.
- Salt: Enhances the flavors of the jelly.
- Pectin: Necessary for thickening the jelly.
- Sugar: Balances the heat and acidity with sweetness.
How to Make Pepper Jelly
STEP 1. Combine ingredients. Add the finely chopped peppers to a large pan along with the sugar, vinegar, lime juice, and salt.
STEP 2. Start cooking. Bring to a boil then reduce heat to medium and cook at a low boil for 10 minutes, stirring often.
STEP 3. Add pectin. Stir in pectin and boil for 1 minute, stirring constantly.
STEP 4. Cool slightly. Remove from heat and cool for 5 minutes.
STEP 5. Jar the mixture. Ladle the hot liquid into clean jars, leaving 1/4 inch headspace, and screw on the lids.
STEP 6. Chill jars. Cool overnight in the refrigerator.
STEP 7. Prepare for preservation. To preserve and jar, clean jars and lids using a steamer rack in a 16-quart pot.
STEP 8. Fill with water. Place jars on the rack and fill the pot with water, enough to cover the jars.
STEP 9. Boil jars. Bring the water to a boil and boil the jars for 10 minutes.
STEP 10. Reprepare pepper jelly. Prepare the pepper jelly per the previous instructions.
STEP 11. Scoop into jars. Scoop it into the jars, leaving 1/4 inch head space.
STEP 12. Secure lids. Clean the lids and secure them onto the jars.
STEP 13. Process jars. Place the filled jars back into the hot water bath and ensure they’re covered with 3 inches of water.
STEP 14. Boil again. Return water to a boil and process for 10 minutes.
STEP 15. Adjust for altitude. If using higher altitudes, process for additional time.
STEP 16. Remove jars. Remove the jars and tighten the screw caps.
STEP 17. Seal jars. The jar lids should make a popping sound as they seal.
STEP 18. Store jars. Store the jars in a cool, dry place. They will last a year or longer.
Why This Recipe Works
The science behind pepper jelly lies in the balance of sugar, vinegar, and pectin. This combination not only ensures that the jelly sets correctly but also preserves the freshness of the peppers. Using the right amount of pectin is crucial for achieving that perfect, spreadable consistency. The acidity from both the apple cider vinegar and lime juice works hand-in-hand with the sugar to create a jelly with a delightful flavor profile and a vibrant color.
This recipe’s streamlined process keeps it accessible without sacrificing quality. The simplicity allows home cooks to celebrate the natural flavors of the ingredients and embrace the joy of creation. Furthermore, the canning method enhances shelf life, allowing you to enjoy your pepper jelly long after the peppers have gone out of season.
Pro Tips for Best Results
1. Choose your peppers wisely. Select fresh, vibrant peppers to maximize flavor and color.
2. Adjust heat levels. Experiment with different types of peppers for varying heat levels.
3. Prep jars in advance. Ensure your jars are clean and sterilized before you start cooking.
4. Follow timing closely. The timing for boiling and processing jars is critical to prevent spoilage.
5. Cool jars properly. Let your jars cool completely and listen for the sealing pop to confirm they are airtight.
Common Mistakes to Avoid
1. Overboiling the mixture. Avoid overcooking, which can lead to a tough texture of the jelly.
2. Incorrect pectin measurement. Ensure the proper type and amount of pectin is used to achieve the right consistency.
3. Improper sealing. Check that the lids are tightened securely to avoid spoilage.
4. Not leaving enough headspace. Failing to leave the recommended headspace can cause jars to overflow during processing.
5. Skipping the water bath. Always process jars in a water bath to ensure safe preservation.
Recipe Variations
1. Fruit-infused pepper jelly: Add fruits like peaches or strawberries for a sweeter twist.
2. Herb-infused version: Incorporate herbs such as rosemary or thyme for an aromatic touch.
3. Smoky pepper jelly: Use smoked chili peppers to give the jelly a distinct smoky flavor.
4. Spiced pepper jelly: Add spices like cumin or coriander for extra depth.
5. Mixed pepper jelly: Combine different varieties of peppers for a complex taste experience.
Nutrition Highlights
| Component | Per Serving |
|---|---|
| Calories | 60 |
| Total Fat | 0g |
| Sodium | 0mg |
| Total Carbohydrates | 16g |
| Sugars | 15g |
How to Serve Pepper Jelly
Pepper jelly can be served in various delightful ways. One popular method is to create a simple appetizer by spreading the jelly over cream cheese or goat cheese and serving it with crackers. This combination balances the sweetness of the jelly with the creaminess of the cheese, making it an irresistible treat.
Additionally, consider using pepper jelly as a glaze for grilled meats like chicken or pork. It adds a layer of flavor that transforms your dishes into gourmet meals. For a unique twist, mix pepper jelly into dressings or marinades for salads and vegetables.
Best Occasions for This Recipe
This pepper jelly recipe is perfect for a variety of occasions. Whether it’s a summer barbecue, a holiday gathering, or a cozy winter evening with friends, it’s sure to impress. Homemade pepper jelly makes for a thoughtful gift around the holidays and is a delightful addition to any potluck or picnic. It’s also a fantastic way to showcase your culinary skills when hosting dinner parties.
Make Ahead & Storage
Making pepper jelly in advance is a great way to save time and enjoy it later. Once cooled, the jars can be stored in a cool, dry place, allowing the flavors to develop further.
Meal Prep
Prepare pepper jelly up to a year in advance, ensuring you have a delightful condiment ready whenever you need it!
Refrigeration
Once opened, store the jar in the refrigerator, where it should last for several weeks.
Freezing
Freezing is not recommended for pepper jelly due to texture changes; however, proper canning allows it to last for a long time.
Reheating
Pepper jelly doesn’t require reheating but can be warmed slightly to make spreading easier if it’s been stored in the refrigerator.

FAQs
1. Can I adjust the heat level? Yes, you can use milder peppers for a milder flavor or hotter varieties for a spicier kick.
2. How long will pepper jelly last? When properly sealed and stored, it can last over a year in a cool, dry place.
3. Is it necessary to use pectin? Yes, pectin helps the jelly set properly; without it, the jelly may not achieve the desired consistency.
4. Can I use frozen peppers? While fresh peppers are recommended for the best flavor, you can use frozen if necessary.
5. What can I serve with pepper jelly? It pairs well with crackers, cheeses, grilled meats, or as an ingredient in dressings and marinades.
Save This Recipe for Later
Don’t forget to save this pepper jelly recipe for future reference! It’s a fantastic addition to your culinary repertoire, and soon you’ll want to share this sweet and spicy delight with family and friends.
Final Thoughts
Pepper jelly is more than just a condiment—it’s a celebration of flavor and creativity in your kitchen. By making your own, you not only ensure it’s fresh and tailored to your taste but also create a memorable experience in the process. Enjoy the vibrant taste of your homemade pepper jelly and the joy it brings to your meals!
Pepper Jelly
Ingredients
For the Pepper Jelly
- 2 cups Finely chopped chili peppers Choose variety based on desired heat level.
- 1 cup Apple cider vinegar Adds tanginess and helps preserve.
- 1/4 cup Lime juice Offers a bright, citrusy flavor.
- 1/2 teaspoon Salt Enhances the flavors of the jelly.
- 1 package Pectin Necessary for thickening the jelly.
- 4 cups Sugar Balances heat and acidity with sweetness.
Instructions
Preparation
- Combine finely chopped chili peppers, sugar, apple cider vinegar, lime juice, and salt in a large pan.
- Bring to a boil, then reduce heat to medium and cook at a low boil for 10 minutes, stirring often.
- Stir in pectin and boil for 1 minute, stirring constantly.
- Remove from heat and cool for 5 minutes, then ladle the mixture into clean jars, leaving 1/4 inch headspace.
- Screw on lids and cool overnight in the refrigerator.
- Prepare jars for preservation by cleaning and sterilizing them.
- Fill a water bath pot with jars placed on a steamer rack and cover with water, then boil for 10 minutes.
- Process jars as instructed and store in a cool, dry place.