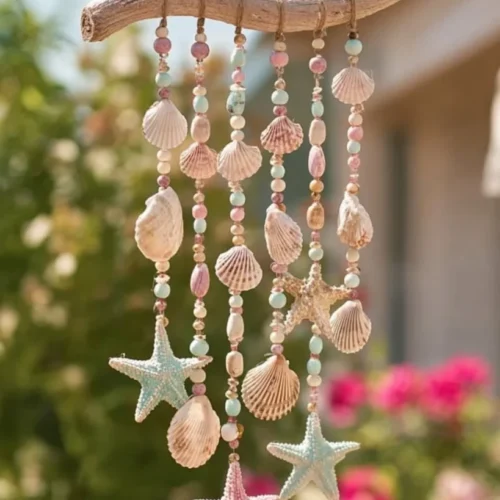
Pastel Seashell Wind Chime
Create a stunning pastel seashell wind chime for your home or garden with this easy and delightful project.
Ingredients
Materials
- 10 pieces shells The primary material that provides texture and a beachy aesthetic.
- 1 roll beading thread Essential for assembling the shells, allowing for flexible and durable design.
- 1 piece wooden ring Serves as the base for hanging the wind chime.
- 1 pack decorative beads Enhance visual appeal and can add a pop of color between the shells.
- 1 bottle paint (pastels) Offers the opportunity to customize the shells with soft hues.
- 1 piece drill Essential for creating holes in shells for threading.
- 1 pair shears Useful for cutting the beading thread to the desired lengths for assembly.
Instructions
Preparation
- Gather materials. Collect all necessary supplies and tools to prepare for crafting.
- Drill holes in shells. Carefully create holes in the shells for easy threading.
- Paint shells. Use pastels to add color to your shells; allow them to dry completely.
Assembly
- Prepare beading thread. Cut lengths of thread as needed for assembling the wind chime.
- Thread shells. Begin stringing the painted shells onto the thread, interspersing with decorative beads.
- Attach to wooden ring. Tie the ends of the beaded threads to the wooden ring, ensuring even spacing.
Final Touch
- Hang wind chime. Find a suitable location to hang your completed wind chime, allowing it to catch the breeze.
Notes
Consider using shells of various shapes and sizes for added visual interest. Make sure to let the paint dry fully before handling the shells to avoid smudging.