Imagine the rich, indulgent flavor of a Dairy Queen Oreo Cookie Ice Cream Cake melting in your mouth. Now picture a version that is not only delicious but also friendly to your health goals. This lightened-up version of the classic dessert is perfect for busy families aiming to indulge without compromising their nutrition. With its delightful layers of creamy vanilla ice cream, crushed Oreo cookies, and luscious sauces, each bite offers a satisfying crunch and smoothness that will make your taste buds dance. Whether you’re celebrating a special occasion or just treating your family, this recipe gives you the classic flavors you love without all the extra calories.
As we juggle hectic schedules and meal prep, finding a dessert that’s healthy and enjoyable can be a challenge. Enter the Dairy Queen Oreo Cookie Ice Cream Cake, reimagined with your health in mind. This cake not only satisfies your sweet tooth, but it’s also an ideal option for those following low-carb, diabetic-friendly, and macro-balanced diets. You’ll appreciate its nutritious profile as well as the time-saving benefits it brings to your kitchen, letting you whip up this dessert in no time. Get ready to create a dessert that’s guilt-free yet incredibly satisfying. Your busy family will thank you!
Why You’ll Love Dairy Queen Oreo Cookie Ice Cream Cake (Creamy, Easy, and Cozy)
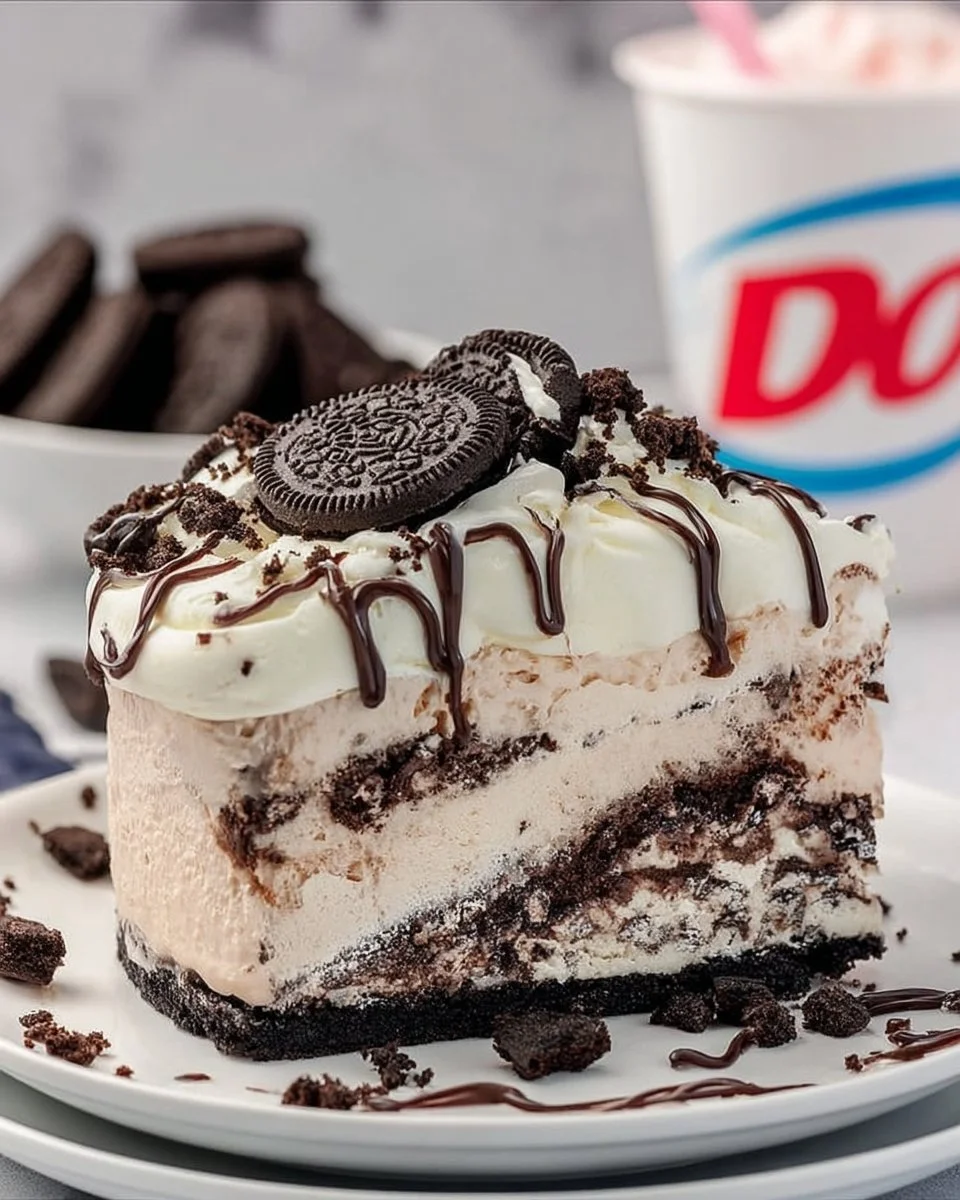
Dairy Queen Oreo Cookie Ice Cream Cake is a delightful treat that combines the creamy, sweet flavor of vanilla ice cream with the crunchy texture of Oreo cookies. This unique combination offers a satisfying experience that everyone at the table will enjoy.
Imagine this: a luscious layer of vanilla ice cream sandwiched between crunchy chocolate cookie crust and topped with whipped cream, drizzled hot fudge, and more Oreos. Best of all, this recipe is incredibly easy to prepare, making it perfect for weeknight celebrations or spontaneous sweet cravings. The simplicity of the preparation allows for the delightful flavors to shine through without overwhelming time constraints. Plus, it’s a fantastic meal prep solution for families looking to indulge in healthier desserts that don’t skimp on taste. You can feel good about serving this cake at any gathering, knowing it aligns with your nutrition goals.
- Speedy Preparation: This recipe is quick to assemble, perfect for busy evenings.
- Irresistible Texture: Enjoy a combination of creamy and crunchy in every bite.
- Pantry-Friendly: All ingredients are common household items.
- Meal-Prep Friendly: Make it ahead to have a sweet treat ready for the week.
- Dietary Conscious: A sugar-friendly option that’s gluten-free and low-carb!
- Heart Healthy: Perfect for enjoying desserts without the guilt.
{image_template}
Ingredients for Dairy Queen Oreo Cookie Ice Cream Cake
- Oreo Cookies – provides a chocolatey crunch and classic flavor.
- Vanilla Ice Cream – adds creaminess and balances the crunch.
- Hot Fudge Sauce – adds rich chocolate flavor, enhancing sweetness.
- Chocolate Syrup – provides an extra chocolate layer for indulgence.
- Whipped Topping – adds a light, creamy finish to the cake.
- Chocolate Cookie Crust – creates the base for a satisfying crunch.
- Additional Oreo Cookies for Topping – more crunch and a beautiful presentation.
Ready to cook? See the recipe card for exact measurements below.
How to Make Dairy Queen Oreo Cookie Ice Cream Cake
Phase 1 – Prep
- Gather all the ingredients on your countertop. This ensures a smooth cooking process.
- Start by crushing the Oreo cookies. Place them in a ziplock bag and use a rolling pin to crush them into fine crumbs.
- Soften the vanilla ice cream slightly by leaving it out at room temperature for about 10 minutes. This makes it easier to spread.
Phase 2 – Cook/Assemble
- In a bowl, combine the crushed Oreo cookies with melted butter to form the chocolate cookie crust.
- Press the mixture into the bottom of a springform pan to create an even layer.
- Add half of the softened vanilla ice cream on top and spread it evenly.
- Drizzle with hot fudge sauce, then layer the remaining vanilla ice cream on top.
- Top with whipped topping and drizzle with chocolate syrup for added flavor.
- Crush some additional Oreo cookies and sprinkle them on top for garnish.
- Cover and freeze for at least 4 hours or until set.
Phase 3 – Serve
- Remove the cake from the freezer about 10 minutes before serving to soften slightly.
- Run a knife around the edges of the pan to easily release the cake.
- Slice into wedges using a sharp knife, wiping the blade between cuts for clean slices.
- Serve immediately and enjoy the rich flavors and textures!
Pro Tips for the Best Results
- For the crust, use a food processor for even finer crumbs.
- To speed up the softening of ice cream, microwave it for 10 seconds if needed.
- Cut clean slices by dipping your knife in warm water before slicing each piece.
- Store leftovers in an airtight container to maintain moisture and freshness.
- Drizzle extra hot fudge on top before serving for an indulgent finish.
Common Mistakes to Avoid
One common mistake is using hard ice cream directly from the freezer. This makes spreading difficult and can lead to uneven layers. Always soften the ice cream beforehand for smooth and easy layering. Leaving it out for 10-15 minutes should do the trick.
Another issue is overfilling the springform pan. This can lead to spillage during freezing. Make sure to spread the ice cream layers evenly and avoid overstuffing. Start with a modest amount and add more gradually to find the best fit.
Lastly, not allowing enough time for freezing can result in a dessert that’s hard to cut. Make sure to freeze it for at least four hours, or overnight for best results. This gives the layers time to set perfectly.
Recipe Variations
- Gluten-Free: Use gluten-free Oreo cookies for a suitable option.
- Dairy-Free: Substitute with dairy-free ice cream alternatives.
- Spicy: Add a sprinkle of cayenne pepper for a surprising twist.
- Herbal: Enhance with mint extract for a refreshing flavor.
- Air Fryer: If you have an air fryer, try making a smaller, personal-sized version!
How to Serve Dairy Queen Oreo Cookie Ice Cream Cake
- Best Pairings: Serve with fresh strawberries or mixed berries.
- Toppings: Experiment with crushed nuts or a drizzle of caramel sauce.
- Garnishes: Use mint leaves for a pop of color and freshness.
Make Ahead & Storage
Can I Meal Prep This?
Yes! This cake is perfect for meal prep. You can assemble it up to two days in advance and store it in the freezer until you’re ready to serve.
Storing Leftovers
Store any leftovers in an airtight container in the fridge for up to 3 days. This ensures the cake stays fresh and ready for snacking.
Freezing
The cake can be frozen for up to 2 months. Just ensure it’s wrapped tightly to avoid freezer burn. Thaw in the fridge overnight before serving for the best texture.
Reheating
With this dessert, reheating isn’t necessary, but if you prefer a softer slice, microwave for 10-15 seconds. Alternatively, you can let it sit at room temperature for about 10 minutes before slicing.

FAQs
Can I use a different kind of ice cream? Absolutely! You can swap vanilla for any creamy flavor that complements Oreos, keeping in mind the taste profiles.
How can I make this cake more decadent? Adding layers of caramel sauce between ice cream layers enhances richness. Just remember to keep an eye on your nutrition goals!
Can I make this in a different pan? Yes, you can use a pie dish or a rectangular baking dish for a different presentation.
Is this recipe suitable for a diabetic diet? Yes, with lower sugar content in mind, it’s designed to be diabetic-friendly!
If you’re excited to dive into the rich, creamy world of our Dairy Queen Oreo Cookie Ice Cream Cake, get ready for a treat that doesn’t stretch your nutrition goals. This cake not only satisfies sweet cravings but can also fit seamlessly into a healthy lifestyle. Don’t forget to rate or comment below, and check out our other recipes for meal-prepping delicious and nutritious desserts!
Dairy Queen Oreo Cookie Ice Cream Cake
Ingredients
For the Crust
- 24 cookies Oreo cookies, crushed Provides a chocolatey crunch
- 1/4 cup Unsalted butter, melted To bind the crust
For the Cake Layers
- 1 quart Vanilla ice cream, softened Easier to spread if slightly softened
- 1/2 cup Hot fudge sauce Adds rich chocolate flavor
- 1/4 cup Chocolate syrup For drizzling
- 1 cup Whipped topping For a light, creamy finish
- 6 cookies Additional Oreo cookies, crushed For topping and garnish
Instructions
Preparation
- Gather all the ingredients on your countertop for a smooth cooking process.
- Crush the Oreo cookies by placing them in a ziplock bag and using a rolling pin.
- Soften the vanilla ice cream by leaving it out for about 10 minutes.
Assembly
- In a bowl, combine the crushed Oreo cookies with melted butter to form the chocolate cookie crust.
- Press the mixture into the bottom of a springform pan to create an even layer.
- Add half of the softened vanilla ice cream on top and spread it evenly.
- Drizzle with hot fudge sauce, then layer the remaining vanilla ice cream on top.
- Top with whipped topping and drizzle with chocolate syrup.
- Sprinkle the crushed additional Oreo cookies on top.
- Cover and freeze for at least 4 hours or until set.
Serving
- Remove the cake from the freezer about 10 minutes before serving.
- Run a knife around the edges to release the cake from the pan.
- Slice into wedges with a sharp knife.
- Serve immediately and enjoy.