
Get ready to indulge in a dish that’s crisp on the outside and juicy on the inside—with zero guilt! This crispy oven fried chicken is not only satisfying but also caters to your health-conscious lifestyle. Imagine biting into a tender piece of chicken, perfectly seasoned and wrapped in a crunchy coating that’ll make your taste buds dance. Plus, it’s designed for busy families who want to maintain their nutrition goals without sacrificing flavor. This recipe offers a hearty meal prep option, perfect for ensuring you have delicious, macro-balanced meals ready throughout the week.
As we all know, juggling family time, work, and meal planning can feel overwhelming, especially if you’re striving to make healthy choices. That’s why this oven-fried chicken is a lifesaver. It ticks all the boxes: filling, flavorful, and fuss-free. Whether you’re preparing a quick weeknight meal or planning for busy days ahead, it helps you stay organized in the kitchen while still delivering a hearty dish that everyone will love. No need for any elaborate frying techniques – say goodbye to greasy, calorie-laden meals! You can enjoy a crispy, delicious dinner without compromising on health.
Why You’ll Love Crispy Oven Fried Chicken (Creamy, Easy, and Cozy)
This crispy oven fried chicken is perfect for weight loss enthusiasts and anyone looking to maintain a heart-healthy lifestyle. It’s a delightful option that transforms your everyday chicken into something extraordinary.
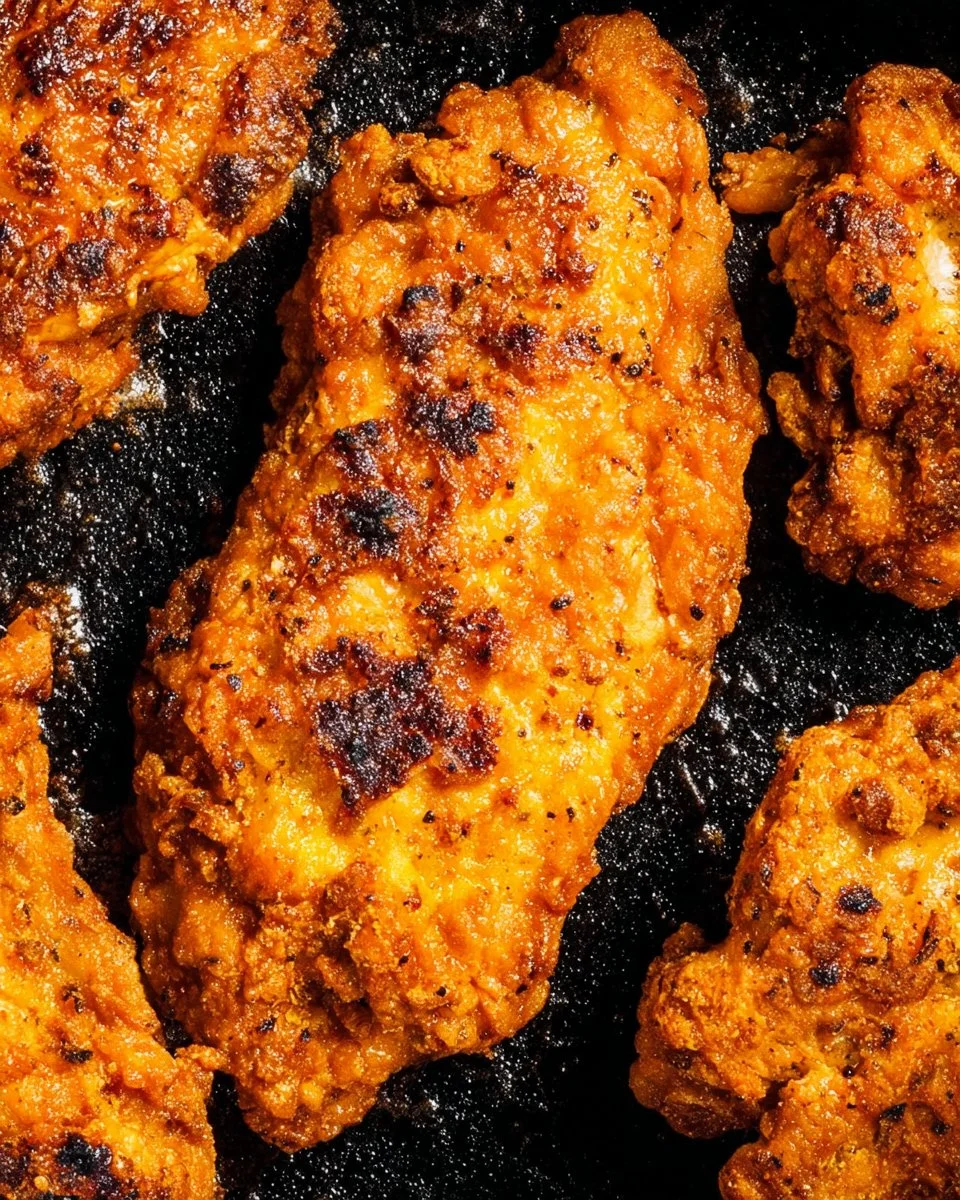
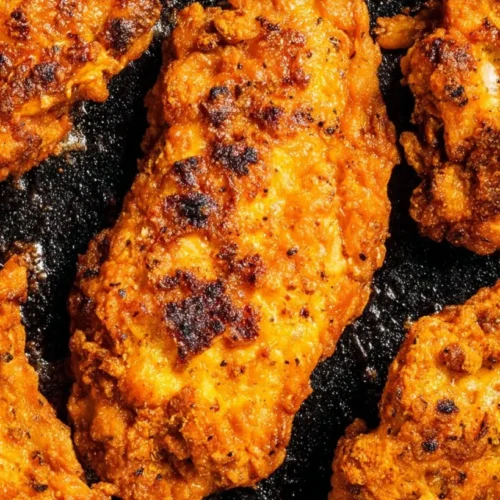
Imagine pulling a tray of golden-brown chicken from the oven, the aroma wafting through your home, teasing your senses. Every bite is a balance of crunch and succulence that makes this dish a perennial family favorite. With its high-protein, low-calorie profile, it aligns beautifully with your nutrition goals without compromising on taste.
- Speed Doesn’t Sacrifice Flavor: Cook it in under 40 minutes, perfect for busy nights.
- Texture That Impresses: The crispy coating balances perfectly with juicy chicken.
- Pantry-Friendly: Uses basic ingredients you likely already have at home.
- Meal-Prep Friendly: Ideal for meal prepping; works beautifully in salads, wraps, or sandwiches.
- Dietary Conscience: Heart-healthy, gluten-free, and totally delicious!
- High Protein: Makes it easier to hit your macro targets with every bite.
Ingredients for Crispy Oven Fried Chicken
- Large Egg – helps to bind the coating for extra crunch.
- Buttermilk – adds a tangy flavor and keeps the chicken juicy.
- All-Purpose Flour – forms the base of the coating for crispiness.
- Breadcrumbs (Panko or Italian Seasoned) – enhances the crunch factor.
- Baking Powder – contributes to the lightness of the coating.
- Salt – key for enhancing overall flavor.
- Ground Paprika – adds a warm color and mild spice.
- Garlic Powder – infuses a rich, savory flavor.
- Onion Powder – complements the garlic for depth.
- Ground Pepper – gives a hint of heat.
- Boneless Skinless Chicken Breast – the star that brings all the flavors together.
- Butter – provides richness and browning in the oven.
Ready to cook? See the recipe card for exact measurements below.
How to Make Crispy Oven Fried Chicken
Phase 1 – Prep
- Preheat your oven to 425°F (220°C).
- In a bowl, whisk together the large egg and buttermilk until combined.
- In a separate dish, combine flour, baking powder, salt, paprika, garlic powder, onion powder, and pepper.
- In a third bowl, place the breadcrumbs. This triple-dipping process is key for maximum crunch.
- Cut the chicken breasts into strips (2-3 per breast) and pat them dry with paper towels.
Phase 2 – Cook/Assemble
- Dip each chicken strip into the egg mixture, letting excess drip off.
- Coat in the flour mixture, ensuring a thorough, even layer.
- Next, place the strip in the breadcrumb bowl, pressing down to stick.
- Arrange coated chicken on a greased baking sheet.
- Drizzle or brush melted butter over the chicken for decadent flavor.
- Bake for 20-25 minutes, turning halfway, until golden brown and cooked through (165°F or 74°C).
Phase 3 – Serve
- Once cooked, remove from the oven and let the chicken rest for 5 minutes.
- Serve with your favorite side dishes or on top of salads for a healthy boost.
- Garnish with fresh herbs or lemon juice for an additional zest!
Pro Tips for the Best Results
- For extra crunch, double coat each chicken piece by repeating the dipping process.
- Use garlic salt instead of regular salt for an amplified garlic flavor.
- Make sure your baking sheet is lined with parchment paper for easier cleanup.
- Let the chicken rehydrate in the buttermilk mixture for up to 30 minutes before breading.
- Store leftovers in an airtight container to keep them crispy.
Common Mistakes to Avoid
One common mistake is skipping the pat-dry step on your chicken. This can lead to sogginess, and you’ll miss that satisfying crunch. Make sure to blot each piece with a paper towel before breading to ensure the coating adheres properly.
Another pitfall is overcrowding the baking sheet. When chicken pieces are too close together, they steam rather than fry. Ensure there’s ample space on your sheet to allow for that beautiful golden browning. Use two trays if necessary.
Lastly, do not rush the cooking time. Chicken should reach an internal temperature of 165°F (74°C) to be safe for consumption. Invest in a meat thermometer for peace of mind, keeping track of doneness without cutting into the meat.
Recipe Variations
- Gluten-Free: Swap regular flour for almond or coconut flour.
- Dairy-Free: Substitute buttermilk with unsweetened almond milk.
- Spicy: Add cayenne pepper to the flour mixture for a kick.
- Herbal: Incorporate fresh herbs like rosemary or thyme in the breadcrumb mix.
- Air Fryer: Cook following the same breading method, adjusting time to about 12-15 minutes at 380°F (193°C).
- Instant Pot: Place in the pot with some broth to cook under pressure for 8 minutes, then broil for crispiness.
How to Serve Crispy Oven Fried Chicken
Best Pairings
- Serve with a garden salad for a balanced meal.
- Pair with roasted vegetables for a hearty dish.
- Try alongside whole grain rice or quinoa for your carb fix.
Toppings
- Top with fresh herbs or a squeeze of lemon for brightness.
- Add your favorite hot sauce for an extra kick.
Garnishes
- Consider a fresh herb sprinkle just before serving.
- Serve with dipping sauces like homemade ranch or BBQ sauce.
Make Ahead & Storage
Can I Meal Prep This?
Absolutely! This crispy oven fried chicken is perfect for meal prep. You can cook it in advance and store it for quick meals throughout the week.
Storing Leftovers
Store leftovers in an airtight container and keep them in the fridge for up to 3 days. Make sure they are completely cool before sealing.
Freezing
You can freeze the cooked chicken for up to 3 months. For best results, freeze in a single layer on a baking sheet, then transfer to a freezer-safe container. The texture may change slightly, so consume quickly!
Reheating
To reheat, place in a preheated oven at 375°F (190°C) for about 10-15 minutes until heated through, giving it a chance to crisp up again. You can also use the microwave, but this may lead to a softer texture.
FAQs
Can I use skin-on chicken for this recipe?Yes, but the cooking time may vary. Ensure the internal temperature still reaches 165°F (74°C).
How can I make the chicken spicier?Add cayenne pepper to the coating mixture to adjust the heat level to your taste.
What’s the best dipping sauce for this chicken?This chicken pairs beautifully with ranch, honey mustard, or spicy ketchup for dipping. Choose your favorite!
Is this recipe suitable for kids?Definitely! The mild flavors and crispy texture make it a kid-friendly option that’s both nutritious and delicious.
This crispy oven fried chicken recipe stands out for being high protein while remaining heart-healthy.
Crispy Oven Fried Chicken
Equipment
- dark-colored pan or cast iron pan for best crispiness
- medium bowl
- separate bowl
- spatula
Ingredients
- 1 large egg
- 1/3 cup buttermilk or regular milk
- 1 cup all purpose flour
- 4 tablespoons breadcrumbs (Panko or Italian seasoned work as well)
- 1 teaspoon baking powder
- 1 1/2 teaspoons salt
- 2 teaspoons ground paprika
- 1 teaspoon garlic powder
- 1 teaspoon onion powder
- 1/2 teaspoon ground pepper
- 2 pounds boneless, skinless chicken breast, cut into strips
- 1/4 cup butter (or more as needed)
Instructions
- Heat oven to 410°F. Place a dark-colored or cast iron pan in the oven to heat up.
- In a medium bowl, whisk together egg and buttermilk.
- In a separate bowl, mix flour, breadcrumbs, baking powder, salt, paprika, garlic powder, onion powder, and ground pepper.
- Toss the chicken pieces in the flour mix, coating evenly and shaking off any extra flour.
- Next, toss the chicken pieces in the egg mixture.
- Dip each piece into the flour mix again, coating very well and pressing the breading on so it sticks.
- Take the hot pan out of the oven and melt the butter on it.
- Place the coated chicken pieces on the pan, leaving enough space between them.
- Bake for 10–12 minutes, carefully flip, and bake for another 5–10 minutes depending on thickness. Add more butter to the pan if needed.
- Finish by broiling the chicken until it turns golden brown and crispy, about 1–2 minutes.
- Let chicken rest for 2–3 minutes, then serve immediately.