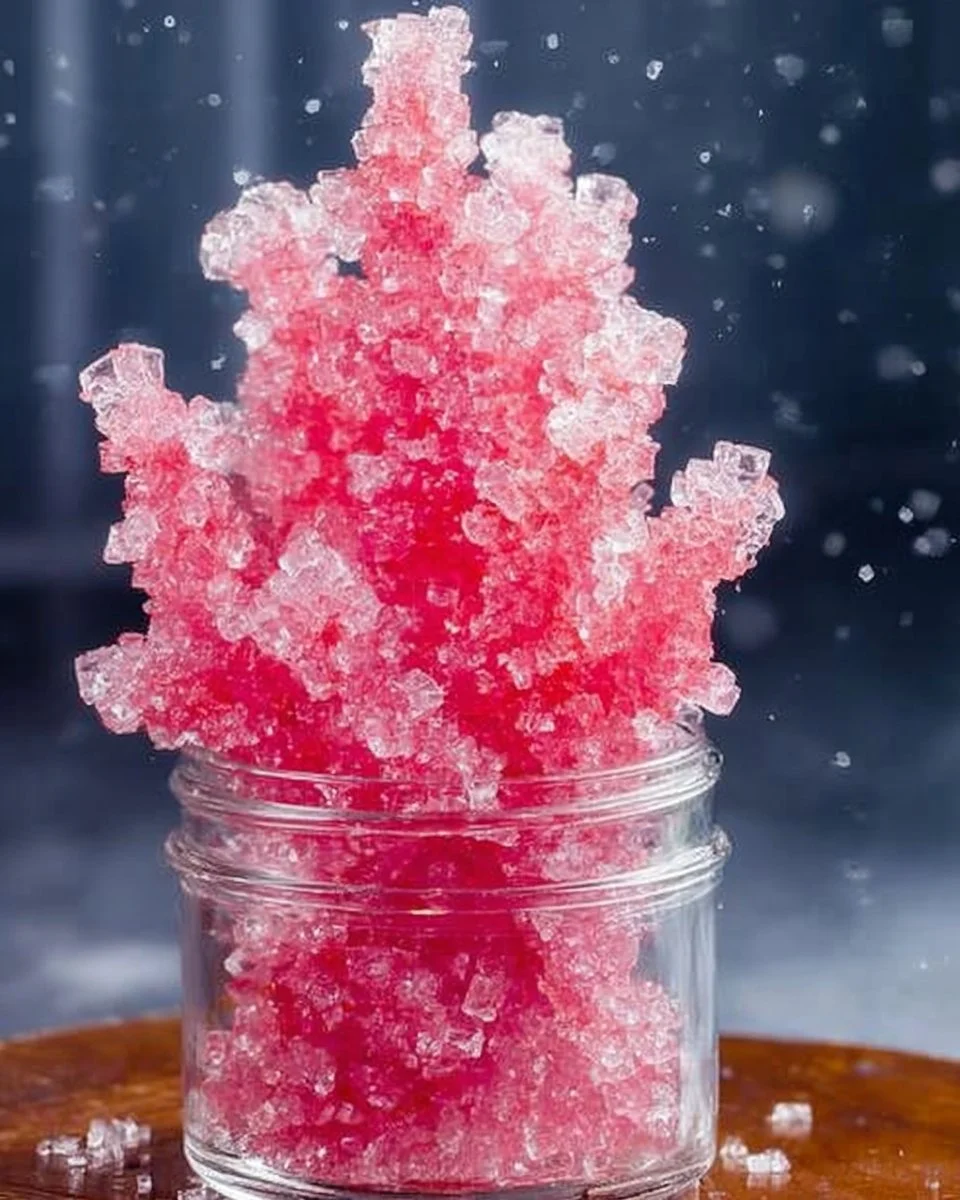
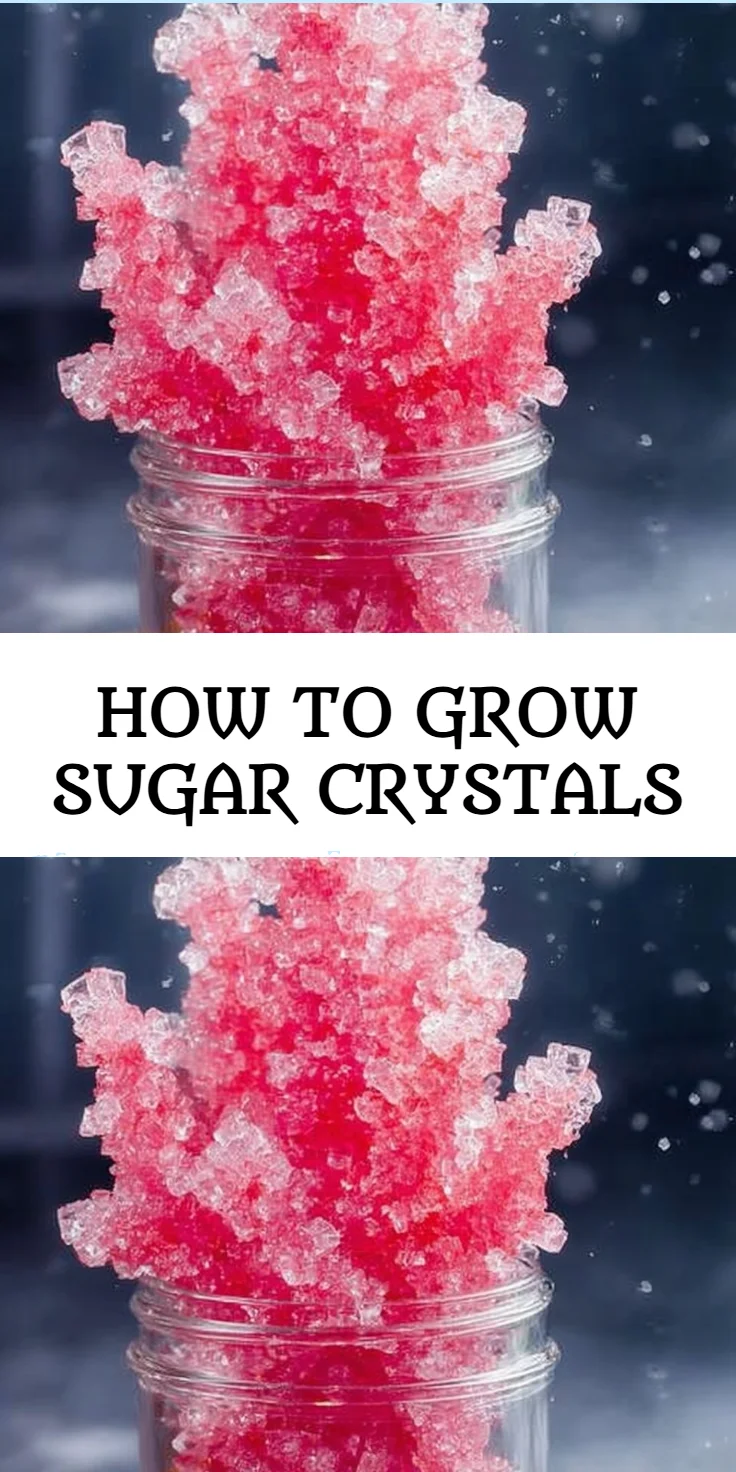
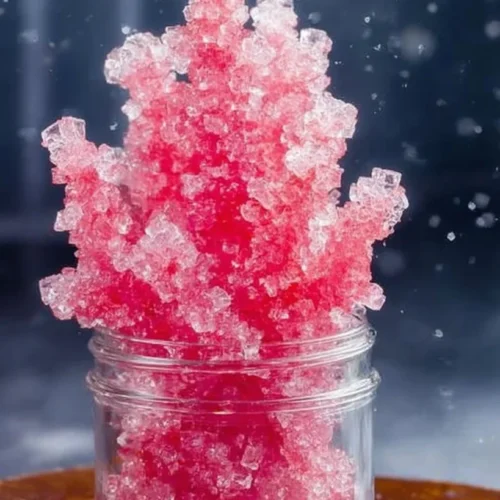
Imagine pulling together a delightful treat that not only captures the essence of sweetness but also provides a stunning visual display. Growing sugar crystals is not just a fun project; it offers a unique experience for busy families looking to engage in healthy, hands-on cooking. This recipe for how to grow sugar crystals gives you the chance to create beautiful, edible crystals right at home, perfect for those who are health-conscious yet love indulging in innovative treats. Plus, it’s a fantastic way to spend quality time with your kids or prep a dazzling centerpiece for a meal prep plan that is both macro-friendly and conversation-starting. Let’s dive into the wonderful world of sugar crystallization!
Why You’ll Love How to Grow Sugar Crystals (Creamy, Easy, and Cozy)
Growing sugar crystals combines science and culinary art, making it a great addition to your healthy lifestyle. With just a few pantry-friendly ingredients, you’re on your way to crafting gorgeous, protein-packed treats that look like professional confections!
Think about it: you can create low-carb, heart-healthy sugar crystals that fit neatly within your nutrition goals while saving time for that family movie night. It’s not just about the sweetness; it’s about the experience! Imagine watching tiny crystals form while your children’s eyes light up with wonder. The tactile feel of the rough crystals mixed with the satisfying crunch transforms an everyday kitchen activity into a memorable occasion. Not to mention, having a stash of these sparkling sweeteners at hand is a great aid for meal prep too!
- Quick to prepare: This sugar crystal adventure only takes a few hours!
- Pantry-friendly: Utilize commonly found items—no need for specialty shops.
- Customizable: Add a touch of flavored extracts for a unique twist.
- Interactive: A fun learning experience for kids and adults alike!
- Macronutrient goals: Ideal for those tracking calories or macros.
- Heart-healthy option: A sweet treat without excessive guilt.
- Visual feast: Perfect for special occasions or as a stunning addition to your kitchen decor.
Ingredients for How to Grow Sugar Crystals
- Granulated Sugar – the base to create our sugar crystals.
- Water – needed to dissolve the sugar fully for crystal growth.
- Clean Glass Jar – a transparent home for your crystallization.
- Skewer or String – the nucleation point for your crystals to form.
- Saucepan – the tool for boiling the sugar solution.
- Spoon – essential for stirring and mixing.
- Optional: Food Coloring or Flavored Extracts – to elevate the appearance and flavor.
Ready to cook? See the recipe card for exact measurements below.
How to Make How to Grow Sugar Crystals
Phase 1 – Prep
- Gather your supplies: Make sure to have everything within reach.
- Prepare the skewer or string: Dip the skewer in syrup or a mixture of sugar and water and let it dry completely. This will help the crystals form more effectively.
- Choose a clean glass jar: Ensure it’s free of contaminants for best results.
Phase 2 – Cook/Assemble
- Combine water and granulated sugar in the saucepan. Use high heat to bring the mixture to a full boil.
- Continuously stir until all the sugar has dissolved completely. Look for a clear solution with no sugar granules remaining.
- Remove from heat and let the sugar solution cool slightly before pouring it into the glass jar.
- Carefully insert your skewer or string into the jar without touching the sides. This is critical as it affects how the crystals will form.
- If desired, add food coloring or flavored extracts to enhance the visual appeal and taste.
Phase 3 – Serve
- Place the jar in a cool, undisturbed area where it won’t get bumped.
- Wait for the magic to happen: It typically takes one to two weeks for visible crystals to form.
- Once the sugar crystals have formed, carefully remove them from the jar. Enjoy your sparkle creation or use them to adorn desserts!
Pro Tips for the Best Results
- Allow the skewer or string to dry thoroughly before placing it in the sugar solution to avoid dislodging any crystals.
- Use a clear glass jar for better visibility of the crystal growth process.
- Store the jar in a stable temperature location to prevent disturbances in crystal formation.
- If using food coloring, a few drops can provide a beautiful hue without overshadowing the treat’s natural sweetness.
- Experiment with different flavored extracts to make unique, colorful crystals.
- Monitor the solution closely to ensure that it doesn’t crystallize too quickly or too slowly.
Common Mistakes to Avoid
One common mistake is not allowing the skewer to dry properly before placing it in the liquid. This can prevent the sugar crystals from forming along the skewer, making it tough to achieve the desired result. Ensure your skewer is completely cool and thoroughly coated in sugar syrup, allowing some time for it to set before introducing it to the solution.
Another issue can be temperature fluctuations. Sugar crystals require a stable environment to grow. If you move the jar frequently or place it in an area where the temperature changes often, it can impact crystal formation. Choose a steady, cool spot, and avoid touching the jar during the crystallization period for optimal results.
Lastly, let the sugar solution cool down before pouring it into the jar. If the solution is too hot, it can lead to the sugar re-crystallizing instantly, affecting the structure. Let it cool to avoid this, giving the crystals room to flourish perfectly.
Recipe Variations
- Gluten-Free: This recipe is naturally gluten-free, making it a perfect choice for everyone!
- Dairy-Free: Enjoy this delicious treat, free from any dairy products.
- Colorful Crystals: Add a mix of food colors to create vibrantly hued crystals.
- Herbal: Incorporate different herbal extracts such as mint for a fresh twist.
- Storage-Friendly: Double the recipe and store half for a later date!
How to Serve How to Grow Sugar Crystals
Best Pairings
- Pair with fresh fruit for a colorful dessert.
- Mix into iced tea or lemonade for a sparkling sweet touch.
- Use as a charming garnish on baked goods.
Toppings
- Sprinkle over cakes for an elegant finish.
- Use as decorative accents in snack boxes.
- Top off yogurt for a sweet crunch.
Garnishes
- Utilize edible flowers to enhance visual appeal.
- Complement with fresh herbs like mint for a pop of color.
Make Ahead & Storage
Can I Meal Prep This?
Yes! You can prepare sugar crystals in advance, storing them for an extended period until you’re ready to serve.
Storing Leftovers
Store leftover sugar crystals in an airtight container at room temperature for up to one month for maximum freshness.
Freezing
Avoid freezing homemade sugar crystals, as it may alter their texture and create a sticky mess.
Reheating
No need to reheat these goodies; simply enjoy them as-is, right out of the jar!

FAQs
How long does it take to grow sugar crystals? Typically, it takes about 1 to 2 weeks for visible crystals to form, depending on your environment.
Can I use different types of sugar? Granulated sugar is preferred, but experimenting with different sugars could yield interesting results.
What should I do if my crystals are too sticky? Make sure you allow the solution to cool sufficiently before pouring, and avoid agitating the mixture.
Can I use flavored extracts to change the taste? Yes! Adding flavored extracts enhances both the taste and aesthetic appeal of your crystals.
Growing sugar crystals is a delightful and engaging way to create something beautiful and tasty at home. This recipe for how to grow sugar crystals brings excitement to your kitchen while meeting your family’s health needs. Don’t forget to strike while the iron’s hot: you’ll want to give this a try and enjoy it together! Rate, comment, or check out our healthy snacks for families for more delicious ideas!
Sugar Crystals
Ingredients
Main Ingredients
- 2 cups Granulated Sugar The base to create our sugar crystals.
- 1 cup Water Needed to dissolve the sugar fully for crystal growth.
- 1 piece Clean Glass Jar A transparent home for your crystallization.
- 1 piece Skewer or String The nucleation point for your crystals to form.
Tools
- 1 piece Saucepan The tool for boiling the sugar solution.
- 1 piece Spoon Essential for stirring and mixing.
Optional Enhancements
- to taste Food Coloring or Flavored Extracts To elevate the appearance and flavor.
Instructions
Preparation
- Gather your supplies: Make sure to have everything within reach.
- Prepare the skewer or string: Dip the skewer in syrup or a mixture of sugar and water and let it dry completely.
- Choose a clean glass jar: Ensure it is free of contaminants for best results.
Cooking
- Combine water and granulated sugar in the saucepan. Use high heat to bring the mixture to a full boil.
- Continuously stir until all the sugar has dissolved completely.
- Remove from heat and let the sugar solution cool slightly before pouring it into the glass jar.
- Carefully insert your skewer or string into the jar without touching the sides.
- If desired, add food coloring or flavored extracts to enhance the visual appeal and taste.
Serving
- Place the jar in a cool, undisturbed area where it won’t get bumped.
- Wait for the magic to happen: It typically takes one to two weeks for visible crystals to form.
- Once the sugar crystals have formed, carefully remove them from the jar and enjoy your sparkle creation.