
Imagine sinking your teeth into a golden, crispy chicken ball that gives way to juicy, tender chicken on the inside. Now picture that perfectly balanced bite dipped into a tangy, aromatic sweet and sour sauce. That’s what this recipe for Crispy Chinese Chicken Balls With Sweet And Sour Sauce Bliss is all about! It’s like a mini explosion of flavor that makes for the perfect cozy meal, whether you’re hosting friends or just treating yourself to something special.
With the holidays around the corner, these little delights are perfect for festive gatherings or even just to enjoy as a cozy night in. The best part? You can whip them up in no time, making it a hassle-free meal that feels like a treat! Plus, even if you’re on a budget, this recipe uses pantry staples that you’re likely to have on hand. So, don’t hesitate to dive in—your taste buds will thank you!
H2: Why You’ll Love Crispy Chinese Chicken Balls With Sweet And Sour Sauce Bliss (Creamy, Easy, and Cozy)
These crispy chicken balls are not only a delightful experience for your taste buds, but they’re also simple to make! Combining juicy chicken with a crunchy exterior, they become even more irresistible when dipped into the sweet and tangy sauce. Enjoy them fresh and hot, and your home will be filled with tantalizing aromas that’ll make everyone gather around.
Here are some reasons to love this dish:
- Quick to prepare: Perfect for weeknight dinners or impromptu gatherings.
- Textural contrast: A satisfying crunch paired with moist chicken.
- Pantry-friendly: Uses everyday ingredients you probably already have.
- Meal-prep friendly: Easily make ahead and reheat for busy days.
- Versatile: Great as an appetizer, snack, or full meal.
- Diet-friendly: Can be easily adapted for different diets.
- Kid-approved: A fun food that even picky eaters will love.
H2: Essential Ingredients for Crispy Chinese Chicken Balls With Sweet And Sour Sauce Bliss
- 1 cup Ketchup – For that sweet, tangy base; consider a no-sugar-added variant for a healthier option.
- 1/2 cup Brown Sugar – Adds sweetness; white sugar can be used as a substitute.
- 1/2 cup Vinegar – Gives that zesty kick; rice vinegar can be substituted for a milder flavor.
- 2 tablespoons Lemon Juice – Fresh juice brightens the sauce; bottled can work in a pinch.
- 1/2 cup Water – Adds the right consistency; using cold water can improve texture.
- 2 tablespoons Cornstarch – Helps thicken the sauce; additional flour can substitute if needed.
- 2 cups Chicken Breasts – Cut into chunks; chicken thighs can offer more flavor.
- 1 cup All-Purpose Flour – Forms the crispy coating; self-rising flour can be used with adjusted baking powder.
- 1/2 cup Cornstarch – Equal parts with flour for the best crispy texture.
- 1 tablespoon Baking Powder – Crucial for achieving a light and airy batter; don’t skip it!
- 1 teaspoon Coarse Kosher Salt – Enhances flavor; table salt can substitute but use less.
- 1 teaspoon Sugar (for batter) – Adds a hint of sweetness; honey can also be an alternative.
- 1 cup Cold Water (for batter) – Always start with cold water for optimal results.
- 2 cups Neutral Oil – Vegetable or canola oil works best for frying.
Ready to cook? See the recipe card for exact measurements below.
H2: How to Make Crispy Chinese Chicken Balls With Sweet And Sour Sauce Bliss
H3: Phase 1 – Prep
- Gather and measure all your ingredients. This includes chicken, flour, and sauce components.
- Cut the chicken breasts into bite-sized chunks. They should be uniform for even cooking.
- Make the sweet and sour sauce by mixing ketchup, brown sugar, vinegar, lemon juice, water, and cornstarch in a saucepan. Stir well until combined.
H3: Phase 2 – Cook/Assemble
- Heat oil in a deep pan over medium heat until it’s shimmering.
- In a bowl, combine flour, cornstarch, baking powder, salt, and sugar. Slowly add cold water and whisk until smooth.
- Dip each chicken chunk in the batter, letting any excess drip off.
- Carefully place the coated chicken pieces into the hot oil, frying in batches to avoid overcrowding. Cook until golden brown, around 4-5 minutes.
H3: Phase 3 – Serve
- Remove chicken from oil and let it drain on paper towels.
- Heat the sweet and sour sauce in a separate pan until it simmers.
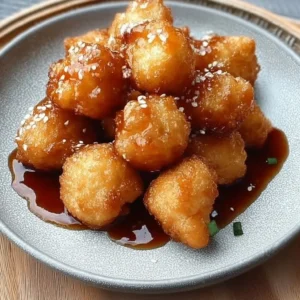
- Serve the crispy chicken balls with the warm sauce drizzled on top or in a bowl for dipping. Garnish with chopped green onions or sesame seeds for an extra touch.
H2: Pro Tips for the Best Results
- Use cold water for the batter: It helps keep the coating crispy.
- Don’t overcrowd the pan while frying: This helps maintain the oil’s temperature, ensuring evenly cooked chicken.
- Allow oil to reheat between batches to keep that golden, crunchy texture.
- Make the sauce first: It can be stored warm, allowing you to focus on frying the chicken without distractions.
- Use chicken thighs if you want more flavor: They tend to be juicier than breasts.
- Store cooked chicken separately from the sauce: This will keep the coating crispy for leftovers.
- Try adding spices or garlic powder to the batter for an extra punch of flavor!
H2: Common Mistakes to Avoid
Mistake #1: Overmixing the batter
Overmixing can make the batter tough and chewy instead of light and crispy. Remember, a few lumps are okay! Just combine until wet.
Mistake #2: Not testing oil temperature
If your oil isn’t hot enough, the chicken will absorb too much oil and become greasy. Use a small piece of batter to test: it should sizzle and float to the surface right away.
Mistake #3: Using pre-cooked chicken
If you use pre-cooked chicken, you’ll miss the amazing texture and flavor that comes from frying raw chicken. Fresh is best!
H2: Recipe Variations
- Gluten-Free: Use gluten-free flour blends in place of all-purpose flour.
- Dairy-Free: This recipe is naturally dairy-free; enjoy!
- Spicy: Add chili flakes or sriracha to the batter for a kick.
- Herbal: Mix in fresh herbs like cilantro or basil in the batter for an aromatic twist.
- Cooking Methods: Try making these in an air fryer for a lighter version!
H2: How to Serve Crispy Chinese Chicken Balls With Sweet And Sour Sauce Bliss
- Best Pairings: Serve with a side of fried rice or steamed veggies for a complete meal.
- Toppings: Garnish with sesame seeds or chopped green onions for a pop of color and extra flavor.
- Dipping Sauces: Serve with additional sweet and sour sauce, soy sauce, or even a spicy mayo.
H2: Make Ahead & Storage
H3: Can I Meal Prep This?
Yes! You can prepare the chicken and sauce ahead of time. Just fry fresh when you’re ready to serve.
H3: Storing Leftovers
Put any leftovers in an airtight container in the fridge for up to three days. Reheat in the oven or on a skillet for best results.
H3: Freezing
These chicken balls freeze well for up to three months. Just remember they might lose some crunch when thawed.
H3: Reheating
Reheat in the oven at 350°F for about 10 minutes, checking to stir occasionally, or microwave for 1-2 minutes until warmed through.
H2: FAQs
Can I use frozen chicken breasts?
Yes! Just thaw them thoroughly before cutting and coating.
How to make it extra creamy without cream?
You can add pureed silken tofu or a splash of coconut milk for a creamier texture.
Can I double it?
Absolutely! Just make sure to fry in batches to maintain that crispy exterior.
How to fix a too-thick sauce?
Add a splash of water or vinegar while mixing over heat until you reach the desired consistency.
Total bliss in a bite is what you get with these Crispy Chinese Chicken Balls With Sweet And Sour Sauce. The perfect crispy coating, paired with the delicious sauce makes for a comforting meal that’s easy to whip up. Give it a try, and don’t forget to let me know how yours turned out!
Crispy Chinese Chicken Balls With Sweet And Sour Sauce Bliss
Ingredients
For the Sweet and Sour Sauce
- 1 cup Ketchup Consider a no-sugar-added variant for a healthier option.
- 1/2 cup Brown Sugar White sugar can be used as a substitute.
- 1/2 cup Vinegar Rice vinegar can be substituted for a milder flavor.
- 2 tablespoons Lemon Juice Fresh juice brightens; bottled can work in a pinch.
- 1/2 cup Water Using cold water can improve texture.
- 2 tablespoons Cornstarch Helps thicken the sauce; additional flour can substitute if needed.
For the Chicken Balls
- 2 cups Chicken Breasts Cut into chunks; chicken thighs can offer more flavor.
- 1 cup All-Purpose Flour Self-rising flour can be used with adjusted baking powder.
- 1/2 cup Cornstarch Equal parts with flour for the best crispy texture.
- 1 tablespoon Baking Powder Crucial for achieving a light and airy batter.
- 1 teaspoon Coarse Kosher Salt Table salt can substitute but use less.
- 1 teaspoon Sugar Adds a hint of sweetness; honey can also be an alternative.
- 1 cup Cold Water Always start with cold water for optimal results.
- 2 cups Neutral Oil Vegetable or canola oil works best for frying.
Instructions
Preparation
- Gather and measure all your ingredients, including chicken, flour, and sauce components.
- Cut the chicken breasts into bite-sized chunks for even cooking.
- Make the sweet and sour sauce by mixing ketchup, brown sugar, vinegar, lemon juice, water, and cornstarch in a saucepan. Stir well until combined.
Cooking
- Heat oil in a deep pan over medium heat until it’s shimmering.
- In a bowl, combine flour, cornstarch, baking powder, salt, and sugar. Slowly add cold water and whisk until smooth.
- Dip each chicken chunk in the batter, letting any excess drip off.
- Carefully place the coated chicken pieces into the hot oil, frying in batches to avoid overcrowding. Cook until golden brown, around 4-5 minutes.
Serving
- Remove chicken from oil and let it drain on paper towels.
- Heat the sweet and sour sauce in a separate pan until it simmers.
- Serve the crispy chicken balls with the warm sauce drizzled on top or in a bowl for dipping. Garnish with chopped green onions or sesame seeds for an extra touch.