
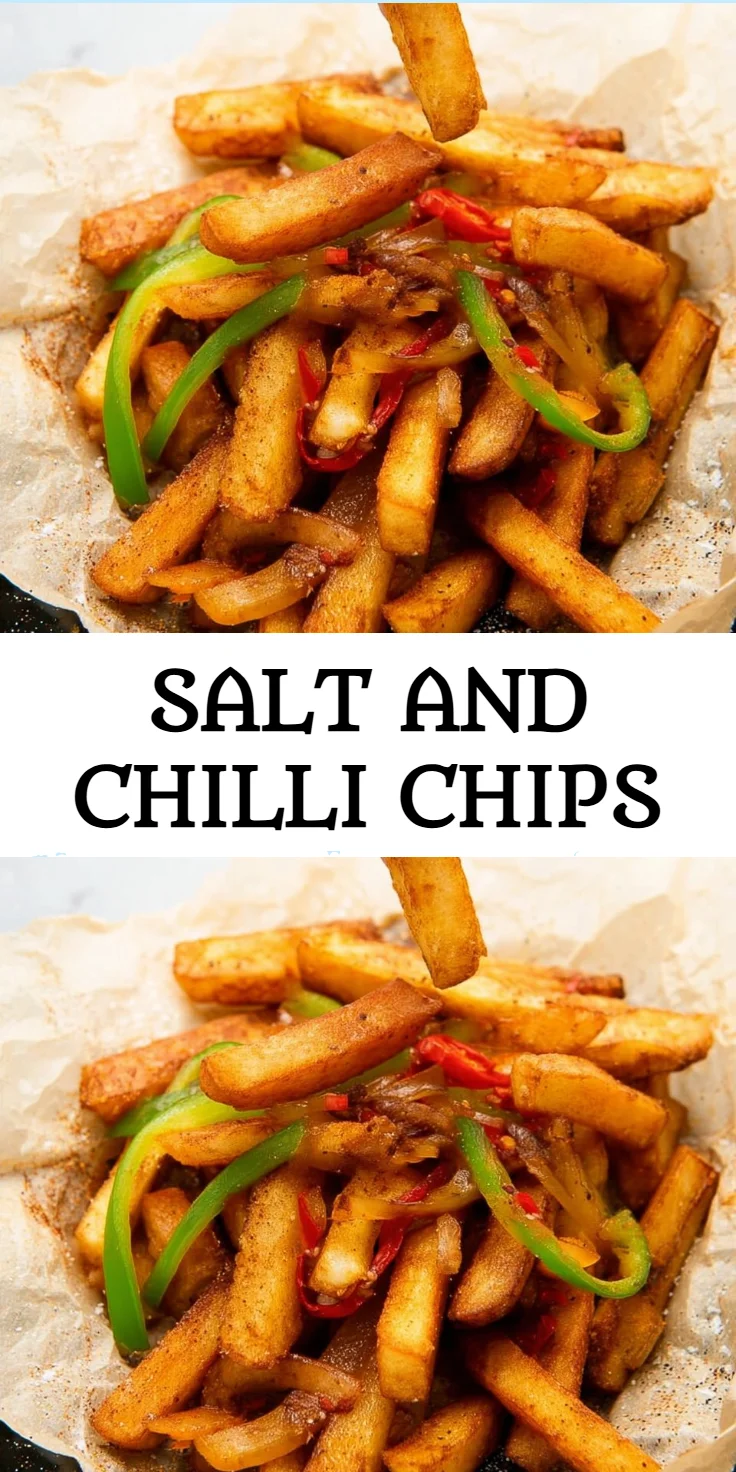
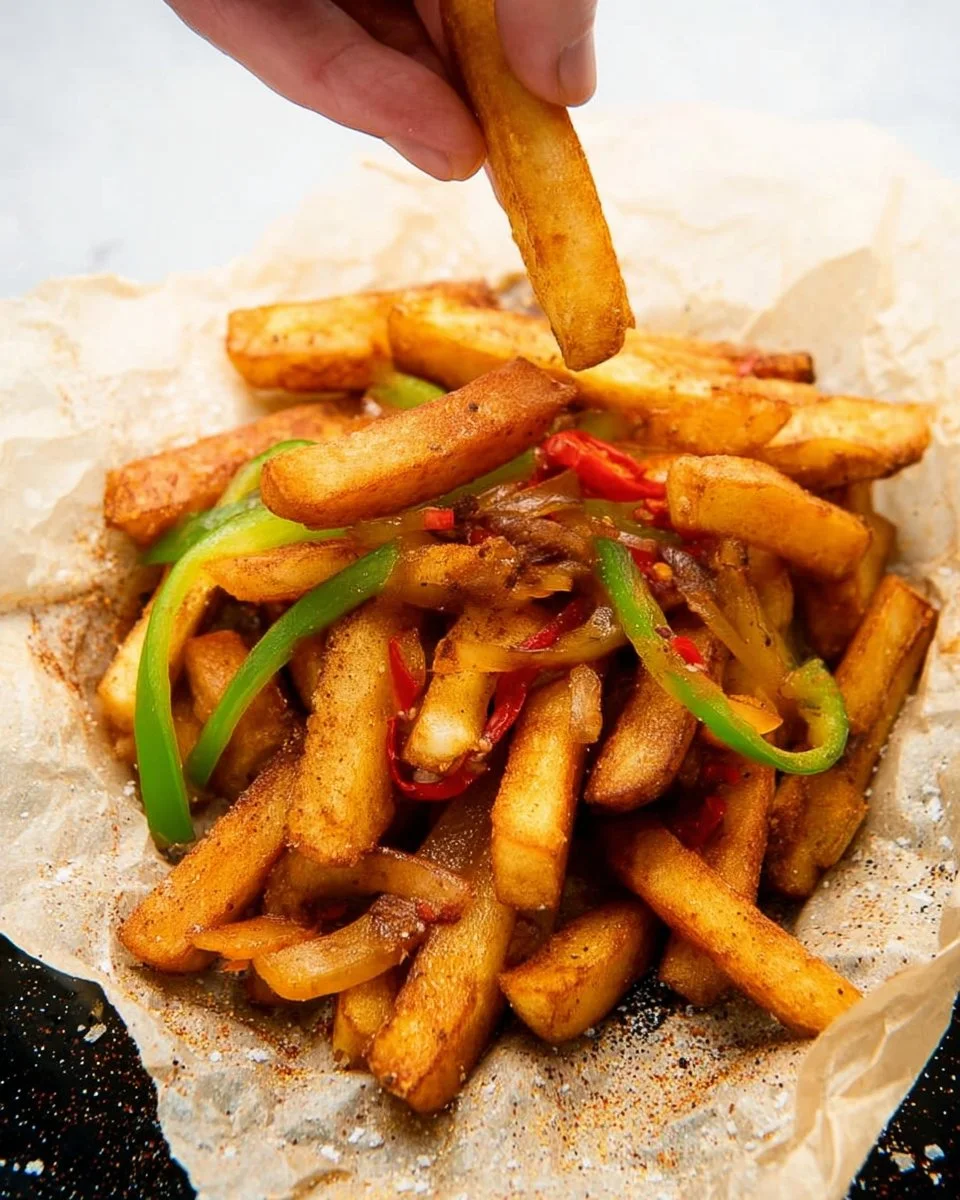
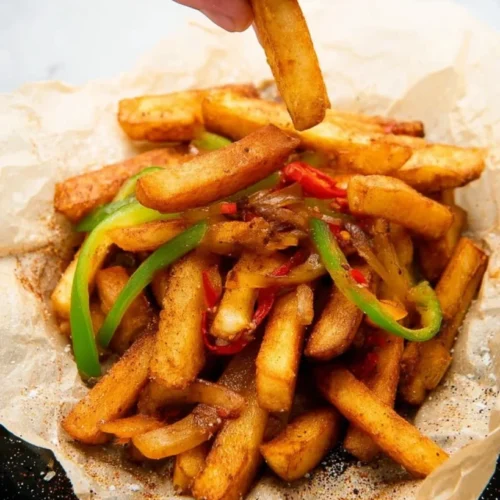
Imagine crispy, flavorful chips that crunch with every bite, paired with a medley of spices that tantalize your taste buds. Our Salt and Chilli Chips recipe is not just a snack; it’s a family-friendly dish perfect for busy weeknights or a health-conscious meal prep. These aren’t just any chips – they’re high in protein, low in calories, and packed with flavor, making them an excellent option for those striving for a healthy lifestyle while still satisfying that snack craving. The best part? They’re made using simple, wholesome ingredients you probably already have in your pantry.
With summer barbecues and cozy nights in mind, this recipe offers a delicious twist on traditional chips that you and your loved ones will adore. Picture the sweet, slightly spicy sensation of fresh peppers mingling with the savory essence of the seasonings. The crispy texture combined with the warmth of baked garlic will leave everyone wanting more. This dish not only satisfies your munchies but also fits seamlessly into your meal planning, allowing you to maintain your nutrition goals without sacrificing flavor. Ready to take your chip-game to the next level? Let’s dive in!
Why You’ll Love Salt and Chilli Chips (Creamy, Easy, and Cozy)
Salt and Chilli Chips are a delightful, flavorful, and protein-rich twist on classic snacking that brings excitement back to the dinner table.
Life is busy, and finding time to prepare healthy meals can be challenging. But the good news is that this Salt and Chilli Chips recipe cuts down on prep time while delivering a burst of vibrant flavor. The combination of crispy chips infused with zesty spices and fresh vegetables transforms a simple dish into an exciting snack option. Not to mention, they’re perfect for families looking to maintain a heart-healthy diet without sacrificing taste. Whether you’re meal prepping for the week or whipping up a quick batch for dinner, these chips provide a crunchy companion to your meals.
- Quick to prepare – Your whole family can enjoy these chips in less than 30 minutes.
- Texture perfection – Crisp chips complemented by tender veggies ensure every bite is satisfying.
- Pantry-friendly – No need for fancy ingredients; everything is likely accessible at home.
- Dietary-friendly – High-protein and low-calorie, perfect for your nutrition goals.
- Meal-prep approved – Easy to batch, these chips are the ideal snack for busy families.
- No fuss – Minimal cleanup makes it easier to stick to your healthy lifestyle.
- Kid-approved – An enticing way to get your little ones to enjoy nutritious veggies!
Ingredients for Salt and Chilli Chips
- Frozen Chips – Provides that essential crunch everyone loves.
- Sesame Oil – Adds a hint of nuttiness that enhances flavors.
- Chinese 5 Spice – A fragrant mix that brings warmth and depth.
- White Pepper – Offers a gentle heat and aromatic kick.
- Fine/Table Salt – Enhances all the flavors without overpowering.
- Garlic Powder – Infuses a savory richness that elevates crunchiness.
- Vegetable Oil – Essential for roasting to crispy perfection.
- White Onion – Sweet and tender, balances the spices beautifully.
- Green and Red Peppers – Sweet and vibrant, they add freshness.
- Spring Onions – Add a lighter, oniony zing and crunch.
- Red Birds Eye Chillies – Provides a punch of heat for spice enthusiasts.
- Garlic – Freshly diced for that aromatic boost.
- Flaky Sea Salt – A finishing touch for texture and flavor.
Ready to cook? See the recipe card for exact measurements below.
How to Make Salt and Chilli Chips
Phase 1 – Prep
- Preheat your oven to 400°F (200°C).
- Slice the white onion, green pepper, and red pepper into thin strips.
- Finely dice the garlic cloves and the red Birds Eye chillies to ensure even flavoring.
- Spread the frozen chips on a baking tray lined with parchment paper for easy cleanup.
- Drizzle the sesame and vegetable oils evenly over the chips.
- Sprinkle the Chinese 5 spice, white pepper, fine salt, and garlic powder over the top.
Phase 2 – Cook/Assemble
- Toss the chips gently to combine the spices evenly.
- Roast in the preheated oven for 20-25 minutes or until golden brown and crispy.
- While the chips are baking, heat a non-stick skillet over medium heat.
- Add the thinly sliced onions and peppers and sauté for 5-7 minutes until softened.
- Add the diced garlic and chillies, cooking for an additional 2-3 minutes until fragrant.
Phase 3 – Serve
- Once the chips are done baking, remove them from the oven.
- Transfer the sautéed vegetables on top of the crispy chips, ensuring even coverage.
- Finish with a sprinkle of flaky sea salt to taste, adding a burst of flavor.
- Serve warm for the best crunch experience and enjoy!
Pro Tips for the Best Results
- For extra crunch, consider air frying the chips instead after seasoning.
- Sauté the vegetables on lower heat to retain their sweetness and vibrant colors.
- Change out the vegetable oil for olive oil for a healthier fat alternative.
- Make sure to spread the chips in a single layer on your baking tray for even cooking.
- Store any leftovers in an airtight container at room temperature for best texture.
Common Mistakes to Avoid
One common mistake is overcrowding the baking tray. This can lead to uneven cooking and soggy chips. To fix this and achieve a perfect batch, spread the chips out in a single layer, giving them space to crisp up nicely.
Another issue arises when seasoning. Not enough seasoning can make the chips bland, while too much can be overpowering. The best approach is to start with smaller amounts, toss ingredients well, and adjust according to taste.
Finally, watch out for overbaking. Keeping an eye on the chips during the last few minutes can prevent burning. When they look golden brown and smell irresistible, they’re likely done!
Recipe Variations
- Gluten-free – All ingredients are naturally gluten-free.
- Dairy-free – This recipe is inherently dairy-free, perfect for lactose intolerant families.
- Spicy – Add more chillies or a sprinkle of cayenne if you love heat.
- Herbal – Garnish with fresh cilantro for an aromatic twist.
- Air Fryer – Use your air fryer for crispy results in less time!
- Stovetop – Sauté the chips in oil for a different texture.
- Instant Pot – Cook chips in batches for a quick snack if desired.
How to Serve Salt and Chilli Chips
- Best Pairings: Serve alongside grilled chicken or fish for a balanced meal.
- Toppings: Consider a drizzle of low-calorie yogurt or avocado crema for added creaminess.
- Garnishes: Fresh herbs or sliced spring onions add a vibrant pop of flavor.
Make Ahead & Storage
Can I Meal Prep This?
Yes! These chips are excellent for meal prep. Simply make a larger batch to have snacks ready for the week ahead.
Storing Leftovers
Store leftovers in an airtight container at room temperature for up to two days. Make sure to let them cool completely before sealing to maintain crispiness.
Freezing
While it’s not recommended to freeze cooked chips, you can freeze the unbaked seasoned frozen chips for up to one month. Reseal them in a bag to minimize freezer burn.
Reheating
To reheat, place chips in the oven at 350°F (175°C) for about 5-7 minutes until warmed through. Alternatively, you can microwave them, covering with a damp paper towel for 30 seconds to retain moisture.
FAQs
Can I use fresh chips instead of frozen? Yes, you can use fresh potatoes; however, you’ll need to slice, soak, and dry them before cooking.
What can I substitute for peppers? You can swap with zucchinis or mushrooms if you prefer a different flavor.
Are these chips healthy? Absolutely! They’re lower in calories and packed with protein, making them a smart choice for snacking.
How can I make this recipe vegan? This recipe is already vegan, so you’re good to go!
If you’re looking for a delightful twist on chips, our Salt and Chilli Chips Recipe is sure to hit the mark. With their heart-healthy ingredients and vibrant flavors, they make a perfect snack or side dish. Don’t forget to rate, comment, or try our other delicious recipes like [High Protein Cauliflower Soup] or [Meal Prep Chicken Tacos]! Your feedback empowers us to keep crafting great content!
Salt and Chilli Chips
Ingredients
Chips and seasonings
- 1 bag Frozen Chips Provides that essential crunch everyone loves.
- 2 tablespoons Sesame Oil Adds a hint of nuttiness that enhances flavors.
- 1 tablespoon Chinese 5 Spice A fragrant mix that brings warmth and depth.
- 1 teaspoon White Pepper Offers a gentle heat and aromatic kick.
- 1 teaspoon Fine/Table Salt Enhances all flavors without overpowering.
- 1 teaspoon Garlic Powder Infuses a savory richness.
- 1 tablespoon Vegetable Oil Essential for roasting.
- 1 medium White Onion Balances the spices beautifully.
- 1 medium Green Pepper Adds freshness.
- 1 medium Red Pepper Adds sweetness.
- 2 stalks Spring Onions Adds a lighter oniony zing.
- 2 teaspoons Red Birds Eye Chillies Provides a punch of heat.
- 2 cloves Garlic Freshly diced for flavor.
- 1 teaspoon Flaky Sea Salt A finishing touch for flavor.
Instructions
Preparation
- Preheat your oven to 400°F (200°C).
- Slice the white onion, green pepper, and red pepper into thin strips.
- Finely dice the garlic cloves and the red Birds Eye chillies.
- Spread the frozen chips on a baking tray lined with parchment paper.
- Drizzle the sesame and vegetable oils evenly over the chips.
- Sprinkle the Chinese 5 spice, white pepper, fine salt, and garlic powder over the chips.
Cooking
- Toss the chips gently to combine the spices evenly.
- Roast in the preheated oven for 20-25 minutes or until golden brown and crispy.
- While the chips are baking, heat a non-stick skillet over medium heat.
- Add the sliced onions and peppers and sauté for 5-7 minutes until softened.
- Add the diced garlic and chillies, cooking for an additional 2-3 minutes until fragrant.
Serving
- Once the chips are done baking, remove them from the oven.
- Transfer the sautéed vegetables on top of the crispy chips.
- Finish with a sprinkle of flaky sea salt to taste.
- Serve warm for the best crunch experience.