
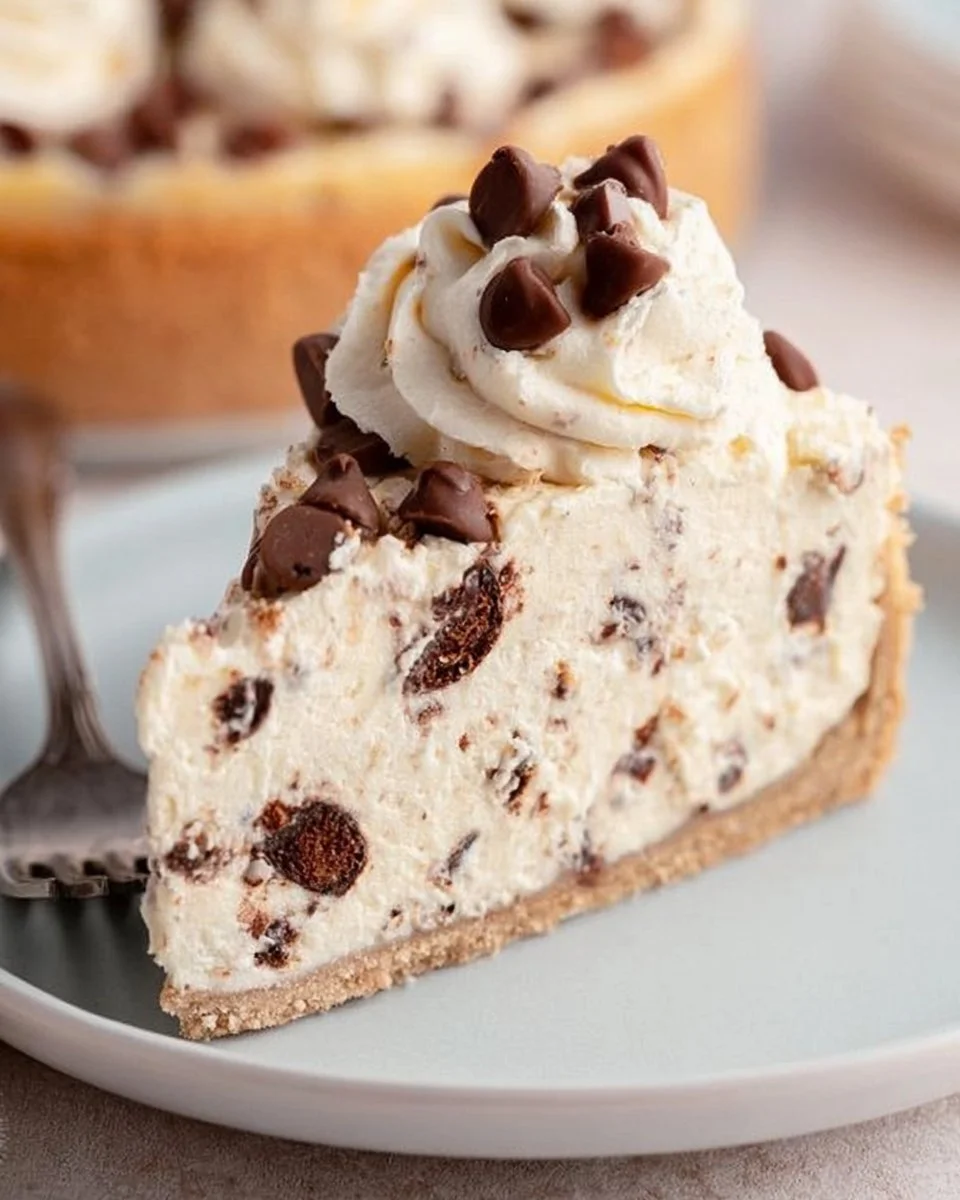
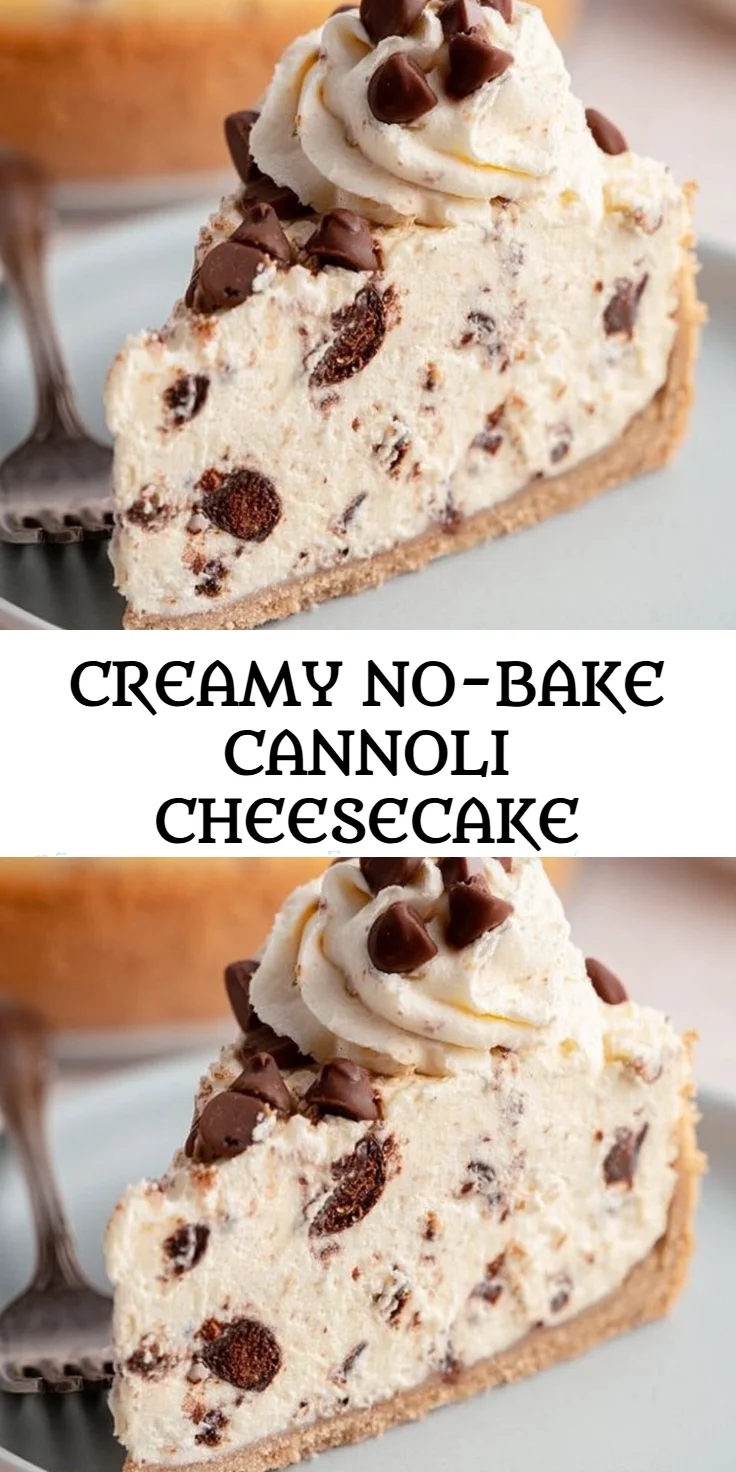
Indulge your sweet tooth with a dessert that feels like a comforting hug on a plate. This creamy indulgence boasts layers of rich flavors blended seamlessly into a luxurious cheesecake that melts in your mouth. Imagine biting into a slice where the smooth creaminess of mascarpone and ricotta dances with the sweet notes of vanilla and a splash of zesty orange. The crunchy vanilla wafer crust provides the perfect contrast, making each bite an exquisite balance of texture and flavor. Plus, this delightful treat requires no baking—saving you time and keeping your kitchen cool! Perfect for gatherings or quiet evenings at home, this cheesecake is not just a dessert; it’s an experience. Prepare to impress your family and friends with this elegant twist on a classic Italian treat that will have them asking for seconds!
Why You’ll Love This Recipe
This delightful cheesecake captures all the classic elements of cannoli in a convenient no-bake format, making it a go-to recipe for any occasion. It’s perfect for those who want to enjoy a rich, creamy dessert without the fuss of traditional baking. The use of heavy cream and multiple types of cheese adds to its richness, creating a dessert that feels luxurious yet is simple to whip up. With its vibrant orange zest and mini chocolate chip sprinkle, this dessert is a feast for not only the palate but also the eyes. It’s the ideal choice for impressing guests at dinner parties, celebrating special occasions, or enjoying a quiet night in with loved ones. By incorporating layers of flavor and textural contrasts, this cheesecake elevates your dessert game while allowing you to savor every bite.
What Makes This Recipe Special
What sets this creamy cheesecake apart from other desserts is its delightful no-bake simplicity combined with the authentic flavors of traditional Italian cannoli. The use of high-quality ingredients, such as mascarpone and whole-milk ricotta, ensures a velvety smoothness that’s hard to resist. The clever incorporation of orange zest adds a refreshing citrus note that brightens the creamy filling. Topped with sweetened whipped cream, chocolate chips, and a sprinkle of chopped pistachios, each slice is a beautiful presentation that will elevate any dessert table. Additionally, it’s easy to customize with personal twists, allowing you to make it uniquely yours. This recipe not only satisfies your cravings but also becomes a beloved favorite among family and friends, making it a staple in your dessert repertoire.
Ingredients
finely crushed vanilla wafers: The base of the crust, providing a sweet and crunchy texture.
unsalted butter: Binds the crust together, adding richness and flavor.
granulated sugar: Optional sweetness for the crust, enhancing the overall flavor.
heavy cream: Creates a light and airy filling, contributing to a smooth texture.
whole-milk ricotta: Offers a creamy foundation with a slightly grainy texture when well-drained.
cream cheese: Gives depth and a rich flavor, helping to create a smooth filling.
mascarpone: Adds luxurious creaminess, elevating the cheesecake to an indulgent treat.
confectioners’ sugar: Sweetens the filling while ensuring a silky smooth consistency.
zest of orange: Adds a bright, citrusy flavor that balances the sweetness.
vanilla extract: Enhances the flavors, adding warmth and aroma.
almond extract: Optional flavoring for a nutty note that complements the other flavors.
mini chocolate chips: Provides delightful bursts of chocolate flavor throughout the filling.
sweetened whipped cream: Adds a light, fluffy texture on top, making for a beautiful presentation.
chopped pistachios: Offers a nutty crunch and vibrant color for garnishing.
more mini chips: For garnish, adding sweetness and visual appeal.
How to Make Creamy No-Bake Cannoli Cheesecake
Phase 1 – Prep
STEP 1. Prepare the crust. Combine the finely crushed vanilla wafers, melted unsalted butter, and optional granulated sugar in a mixing bowl.
STEP 2. Press the crust. Evenly press the mixture into the bottom of a springform pan to form a solid base.
STEP 3. Chill the crust. Place the crust in the refrigerator to set while preparing the filling (about 30 minutes).
Phase 2 – Cook
STEP 4. Whip the cream. In a large bowl, whip the heavy cream until soft peaks form, then set aside.
STEP 5. Mix the cheeses. In another bowl, combine the well-drained ricotta, softened cream cheese, and mascarpone until smooth and creamy.
STEP 6. Add sweetness and flavor. Gradually add confectioners’ sugar, orange zest, vanilla extract, and optional almond extract to the cheese mixture until well combined.
STEP 7. Fold in the cream. Gently fold the whipped heavy cream and mini chocolate chips into the cheese mixture until just combined to maintain fluffiness.
Phase 3 – Serve
STEP 8. Fill the crust. Spoon the cheesecake filling into the chilled crust, smoothing the top with a spatula.
STEP 9. Chill the cheesecake. Refrigerate the cheesecake for at least 4 hours or until set.
STEP 10. Garnish and serve. Before serving, top with sweetened whipped cream, chopped pistachios, and additional mini chocolate chips.
Pro Tips
For the ultimate no-bake cheesecake experience, ensure your ricotta is extremely well-drained to avoid excess moisture, which can dilute the creaminess of your filling. Using room temperature cream cheese and mascarpone aids in achieving a smooth blend without lumps. Don’t skip the chilling time; allowing the cheesecake to set properly helps it maintain its shape when sliced. If you prefer a firmer texture, consider refrigerating it overnight. Experiment with garnishes to add a personal touch, such as fresh fruit or a drizzle of chocolate sauce. Finally, when whipping the cream, avoid over-whipping to maintain that luscious lightness—stop when soft peaks form for the best texture.
Common Mistakes to Avoid
One common mistake is not draining the ricotta thoroughly, which can lead to a watery cheesecake. Ensure it’s well-drained to achieve the desired creamy consistency. Additionally, using cold ingredients can result in a lumpy filling, so let your cheese come to room temperature before mixing. Avoid over-mixing your filling once the whipped cream is added; gently folding will maintain the light and airy texture that makes this dessert so delightful. Finally, be patient with the chilling time—rushing can result in an unstable cheesecake. Allowing it to set properly is crucial for achieving that perfect slice.
Variations
• Add berries for a fruity twist.
• Use almond flour for a gluten-free crust.
• Swap chocolate chips for dried fruit for a different flavor profile.
• Experiment with different citrus zest like lemon or lime for a fresh take.
• Incorporate a hint of espresso for a coffee-flavored version.
Serving Ideas
This luscious cheesecake makes a stunning centerpiece for any gathering. Consider pairing it with a bowl of fresh berries or a rich chocolate sauce on the side for drizzling. For a textural contrast, serve with crispy biscotti or a crunchy cookie crumble. If you’re hosting a special occasion, a light dusting of cocoa powder or extra chopped pistachios can elevate your presentation. Serve with a rich cup of coffee or a dessert wine to complement the flavors beautifully, enhancing the overall experience for your guests.
Meal Prep & Storage
This no-bake cheesecake is an excellent option for meal prep, as it can be made ahead of time and stored in the refrigerator for several days. It holds up well for up to five days in an airtight container. For best results, keep the garnishes separate until serving to prevent them from becoming soggy. If you need to freeze leftovers, wrap them tightly in plastic wrap and foil, ensuring no air is trapped, for up to three months. Allow the cheesecake to thaw in the refrigerator overnight before serving again to maintain its delicious texture.
Insert:
FAQs
Can I make this cheesecake dairy-free?
Yes, you can substitute dairy ingredients with dairy-free alternatives like cashew cream or coconut cream and vegan cream cheese options.
How can I ensure my cheesecake sets correctly?
Make sure to chill your cheesecake for the recommended time, ideally overnight, to allow it to firm up completely.
What should I do if my cheesecake cracks?
Cracking can occur from temperature changes. Remove it from the fridge slowly and avoid rapid temperature shifts during chilling.
Can I use a different crust?
Absolutely! You can use crushed graham crackers, Oreos, or even a gluten-free cookie mix for an alternative crust.
How should I cut and serve the cheesecake?
Use a sharp knife dipped in hot water for cleaner slices, wiping the blade in between cuts for the best presentation.
Is this cheesecake suitable for outdoor events?
Keep in mind that no-bake cheesecakes can be sensitive to heat. If serving outdoors, consider using a cooler to keep it chilled until serving.
Conclusion
Creating this creamy masterpiece is easier than you might think. With its rich flavors and smooth textures, this cheesecake is bound to be a favorite among family and friends alike. Perfect for any gathering or as a sweet treat at home, this dessert is one you’ll return to again and again. Embrace the joy of homemade desserts with this comforting choice!
Creamy No-Bake Cannoli Cheesecake
Ingredients
For the crust
- 2 cups finely crushed vanilla wafers The base of the crust, providing a sweet and crunchy texture.
- 1/2 cup unsalted butter, melted Binds the crust together, adding richness and flavor.
- 2 tablespoons granulated sugar Optional sweetness for the crust, enhancing the overall flavor.
For the filling
- 1 cup heavy cream Creates a light and airy filling, contributing to a smooth texture.
- 1 cup whole-milk ricotta, well-drained Offers a creamy foundation with a slightly grainy texture.
- 8 ounces cream cheese, softened Gives depth and a rich flavor to the filling.
- 1 cup mascarpone Adds luxurious creaminess, elevating the cheesecake.
- 1/2 cup confectioners’ sugar Sweetens the filling while ensuring a silky smooth consistency.
- 1 tablespoon zest of orange Adds a bright, citrusy flavor that balances the sweetness.
- 1 teaspoon vanilla extract Enhances flavors, adding warmth and aroma.
- 1/2 teaspoon almond extract Optional flavoring for a nutty note.
- 1/2 cup mini chocolate chips Provides delightful bursts of chocolate flavor.
For garnishing
- 1 cup sweetened whipped cream Adds a light, fluffy texture on top.
- 1/4 cup chopped pistachios Offers a nutty crunch and vibrant color.
- 1/4 cup more mini chocolate chips For garnish, adding sweetness and visual appeal.
Instructions
Preparation
- In a mixing bowl, combine the finely crushed vanilla wafers, melted unsalted butter, and optional granulated sugar.
- Evenly press the crust mixture into the bottom of a springform pan to form a solid base.
- Place the crust in the refrigerator to set while preparing the filling (about 30 minutes).
Filling
- In a large bowl, whip the heavy cream until soft peaks form, then set aside.
- In another bowl, combine the well-drained ricotta, softened cream cheese, and mascarpone until smooth and creamy.
- Gradually add confectioners’ sugar, orange zest, vanilla extract, and optional almond extract to the cheese mixture until well combined.
- Gently fold the whipped heavy cream and mini chocolate chips into the cheese mixture until just combined to maintain fluffiness.
Assembly
- Spoon the cheesecake filling into the chilled crust, smoothing the top with a spatula.
- Refrigerate the cheesecake for at least 4 hours or until set.
- Before serving, top with sweetened whipped cream, chopped pistachios, and additional mini chocolate chips.