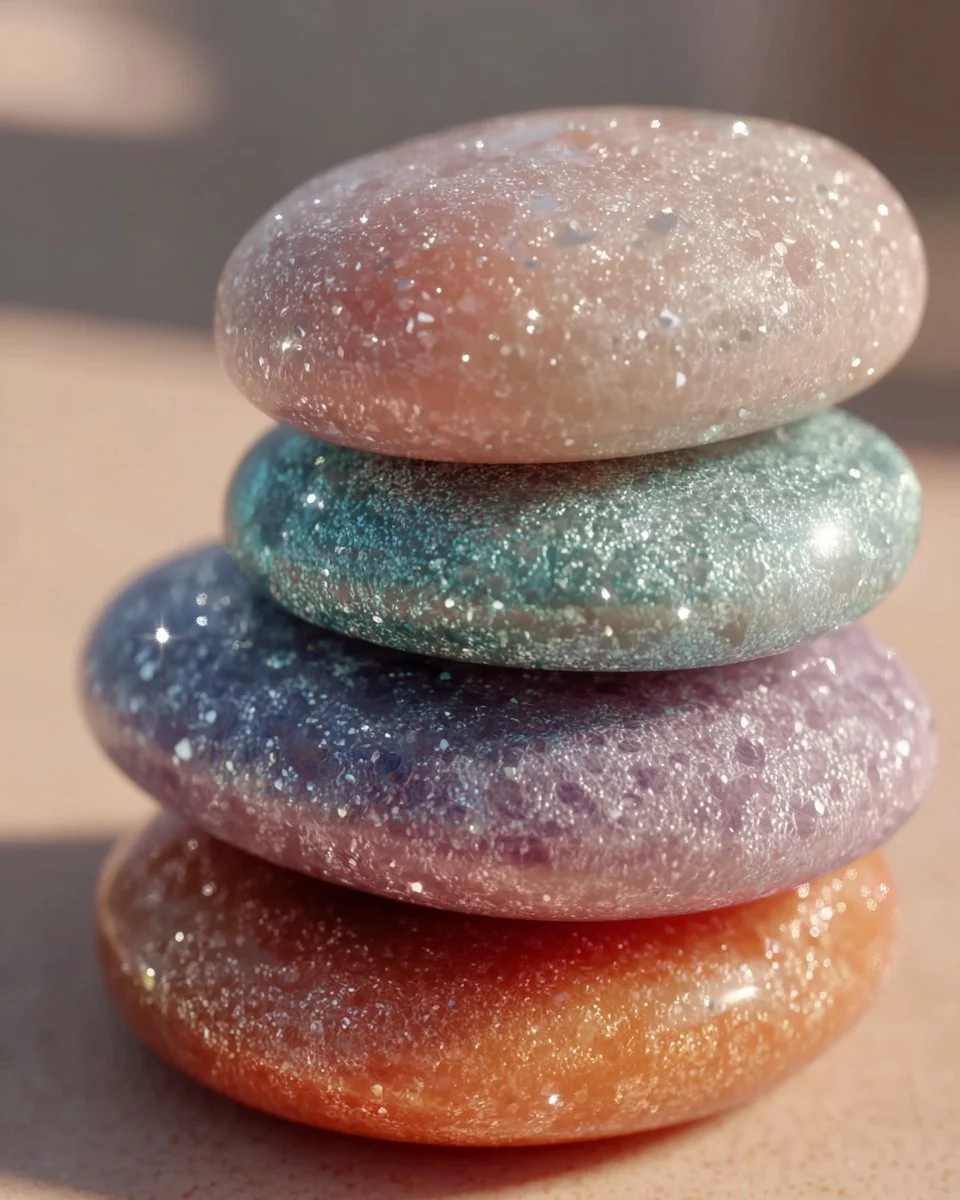
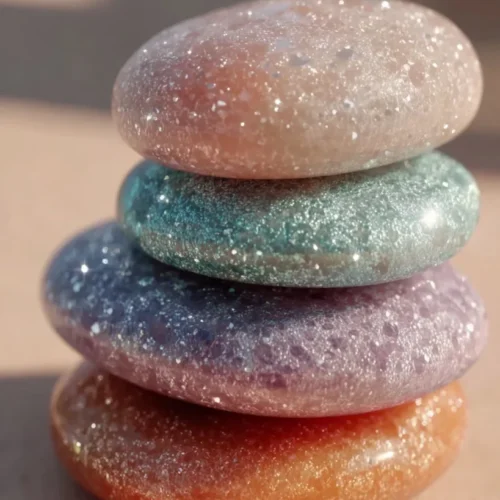
Crafting can be a cherished family activity, especially when it offers both creativity and relaxation. Picture this: after a long day at school, your little ones gather around the table, eager to express their artistic sides while also engaging in a fun anti-stress project. These sparkling anti-stress stones provide just that—a perfect blend of creativity and calming benefits. As family members transform plain stones into colorful gems, you’ll witness giggles and smiles, all while fostering connections through shared creativity. The tactile experience of decorating the stones with vibrant colors and glimmering sparkles is bound to engage both children and adults alike. Plus, these stones make beautiful home decor that can brighten up any space! Whether you’re looking for easy after-school crafts to occupy the kids or a fun way to unwind together, this project is the ideal solution. Gather your supplies and get ready to create wonderful memories as you embark on this artistic journey together.
Why You’ll Love This Recipe
This crafting project stands out not just for its simplicity but also for the joy it brings to your family. It requires minimal supplies, making it a budget-friendly option for all. Each participant can personalize their stones, igniting their creativity and giving them a sense of accomplishment. As you decorate, the vibrant colors and textures can uplift moods and spark conversations. Plus, the finished stones serve multiple purposes—whether as artistic decor, garden ornaments, or thoughtful gifts. The fun of this project doesn’t end with crafting; there’s the added benefit of stress relief that comes from using your hands creatively. As you engage in this process, you’ll not only have a lovely piece of art but also create lasting memories with your loved ones. It’s a simple, effective way to carve out quality time with family amid busy schedules.
What Makes This Recipe Special
This crafting activity caters to all ages, making it a versatile choice for families. Even the tiniest hands can participate, leading to colorful, artists’ masterpieces that hold sentimental value rather than realistic precision. What makes these anti-stress stones truly special is their therapeutic advantage. Engaging in creative hands-on activities has been shown to enhance mindfulness and reduce anxiety levels. The glitter and colors add an element of fun, inspiring imagination and joy throughout the process. Moreover, each stone stands as a unique creation—a testament to family bonding and cooperation. You can curate a collection of these stones over time, showcasing your family’s artistic growth. In a tech-heavy world, this handmade project provides a refreshing break, inviting connection through crafting. The result? Not just beautiful rocks, but a shared experience that enriches your family’s connection.
Ingredients
smooth stones: The canvas for your artistic expression, serving as the base for your creations.
acrylic paint: Provides vibrant colors to bring your stones to life, ensuring durable artwork.
paintbrushes: Essential for applying paint precisely and intricately to your stones.
glitter: Adds a dazzling effect and texture, making your stones sparkle beautifully.
mod podge: A sealing finish that protects your artwork and enhances durability.
paper towels: Useful for cleaning up spills and drying paint.
palette: Helps in mixing colors and organizing your materials efficiently.
optional embellishments: Such as rhinestones or stickers to further personalize your creations.
How to Make Create Easy After School Crafts: Sparkling Anti-Stress Stones for the Family
STEP 1. Gather your materials. Collect all supplies needed for decorating the stones to ensure an organized workspace.
STEP 2. Prep the stones. Clean the smooth stones thoroughly with water and let them dry completely to ensure paint adheres well.
STEP 3. Choose your colors. Select the acrylic paint shades that inspire you and place them on your palette for easy access during painting.
STEP 4. Paint the base coat. Apply the acrylic paint to the stones with a paintbrush, covering the entire surface for a solid color foundation.
STEP 5. Let the base dry. Allow the first coat of paint to dry completely before moving on to adding designs or details to ensure they don’t smudge.
STEP 6. Add designs and patterns. Use different brushes to paint unique patterns, symbols, or images on each stone, expressing your creativity.
STEP 7. Add glitter. Before the paint dries, sprinkle glitter on top to create a sparkling effect, ensuring it sticks to the wet paint.
STEP 8. Apply Mod Podge. Once everything is dry, use a paintbrush to coat the stones with Mod Podge for protection and a glossy finish.
STEP 9. Let dry completely. Allow the Mod Podge to dry thoroughly to ensure your beautiful designs are sealed and long-lasting.

Pro Tips
To create a smooth crafting experience, it’s important to have everything organized and set up ahead of time. Choose a work surface that can get a bit messy, and lay down paper towels to catch any paint drips. For younger children, keep the designs simple—handprints or basic shapes can be a delightful approach. Consider doing a color theme or seasonal designs to keep the creativity flowing. If the weather permits, taking the activity outdoors can allow for a more relaxed atmosphere and easier cleanup. Lastly, don’t forget to encourage sharing—children can trade stones with each other, promoting interaction and even gifting opportunities!
Common Mistakes to Avoid
One common mistake is moving too quickly between steps; always ensure each layer of paint or glitter dries completely to avoid muddy colors. It’s also advisable to use non-toxic, washable materials to ensure safety, especially with young children involved. Another misstep is overloading the stones with too many embellishments; simplicity often leads to stunning results. If you’re using Mod Podge, applying too thick of a layer can result in a goopy finish instead of a clean gloss. Finally, remember to minimize distraction. A focused environment allows everyone to fully immerse themselves in this calming and creative process, resulting in beautiful and personal stone creations.
Variations
• Use different sizes and shapes of stones for added interest.
• Experiment with watercolor paints for a softer effect.
• Decorate stones using decoupage techniques for unique textures.
• Try painting inspirational words or quotes for positive reminders.
• Incorporate natural elements like leaves or flowers for a rustic look.
Serving Ideas
These sparkling stones serve as wonderful home decor accents, beautifying shelves or table centerpieces. They can also be delightful garden ornaments, adding a touch of color to outdoor spaces. Consider using them as personalized gifts for friends or family members, each stone telling a story. Hosting a family gathering? Use your crafted stones as place cards or conversation starters. Children can also play with them as decorative pieces for pretend play, integrating their creativity into other aspects of their lives.
Meal Prep & Storage
Once your anti-stress stones are complete, store them in a cool, dry place to maintain their shine and longevity. If you’ve crafted items as gifts, wrap them carefully in colorful tissue paper or place them in decorative bags. It’s also smart to create a crafting station or storage container for supplies, keeping everything organized for future projects. If you have leftover materials, label and store them in airtight containers to ensure they remain usable for your next crafting adventure.
FAQs
Can kids of all ages participate in this craft?
Yes, this craft is suitable for children of various ages. Younger kids may need assistance with painting and finer details, while older kids can enjoy complete independence.
What type of paint is best for stones?
Acrylic paint is recommended due to its vibrant colors, durability, and ability to adhere well to stone surfaces.
How can I keep the stones from fading outdoors?
Using a protective sealant like Mod Podge will help preserve the colors and prevent fading when exposed to sunlight and rain.
Will this craft create a mess?
Some mess is likely, so it’s best to protect your crafting space with old newspapers or a plastic cover. Keeping water and paper towels handy for quick clean-ups can help mitigate splatters.
How long does it take for the stones to dry?
Drying times can vary; typically, the base coat of paint takes about 30-60 minutes to dry, while Mod Podge may take a few hours. Always allow ample time for each layer to ensure a smooth finish.
Conclusion
Crafting sparkling anti-stress stones is not just a fun after school project but also a way to bond with your family while unleashing creativity. With minimal supplies and endless personalization options, you can create memorable keepsakes that bring joy and tranquility into your home. Grab those stones and paintbrushes, and let your family’s artistic spirit shine bright!
Sparkling Anti-Stress Stones
Ingredients
Craft Supplies
- 5 pieces smooth stones The canvas for your artistic expression.
- 1 bottle acrylic paint Provides vibrant colors for your stones.
- 2 pieces paintbrushes Essential for applying paint intricately.
- 1 pack glitter Adds a sparkling effect to your stones.
- 1 bottle Mod Podge A sealing finish to protect your artwork.
- 5 pieces paper towels Useful for cleanup and drying paint.
- 1 piece palette For mixing colors during the project.
- optional variety embellishments (rhinestones, stickers) For further personalization of your creations.
Instructions
Crafting Steps
- Gather your materials. Collect all supplies needed for decorating the stones.
- Prep the stones. Clean the smooth stones thoroughly with water and let them dry.
- Choose your colors. Select the acrylic paint shades you want to use.
- Paint the base coat. Apply acrylic paint to the stones with a paintbrush, covering the entire surface.
- Let the base dry. Allow the first coat of paint to dry completely.
- Add designs and patterns. Use different brushes to paint unique patterns on each stone.
- Add glitter. Before the paint dries, sprinkle glitter on top to stick to the wet paint.
- Apply Mod Podge. Once everything is dry, coat the stones with Mod Podge for protection.
- Let dry completely. Allow the Mod Podge to dry thoroughly to seal your designs.